In certain situations, it becomes necessary to restore Windows 11 to its original state, whether due to selling the device, the presence of viruses or unwanted applications, or system errors that require a fresh start.
Since a clean install can be time-consuming, similar to Windows 10, you can opt for the reset method in Windows 11 to revert the system to its initial installation state.
So, how exactly can you reset Windows 11? This time, dgdig will summarize the quick steps for you.
A quick note: if your device is experiencing errors or issues, the reset method should be used as a last resort after trying other solutions, as this process will delete some or all user data depending on the option you choose.
Always remember to back up and save all important data to an external hard drive or cloud storage to ensure your work remains secure.
Step 1. First, navigate to Settings > System > Recovery.
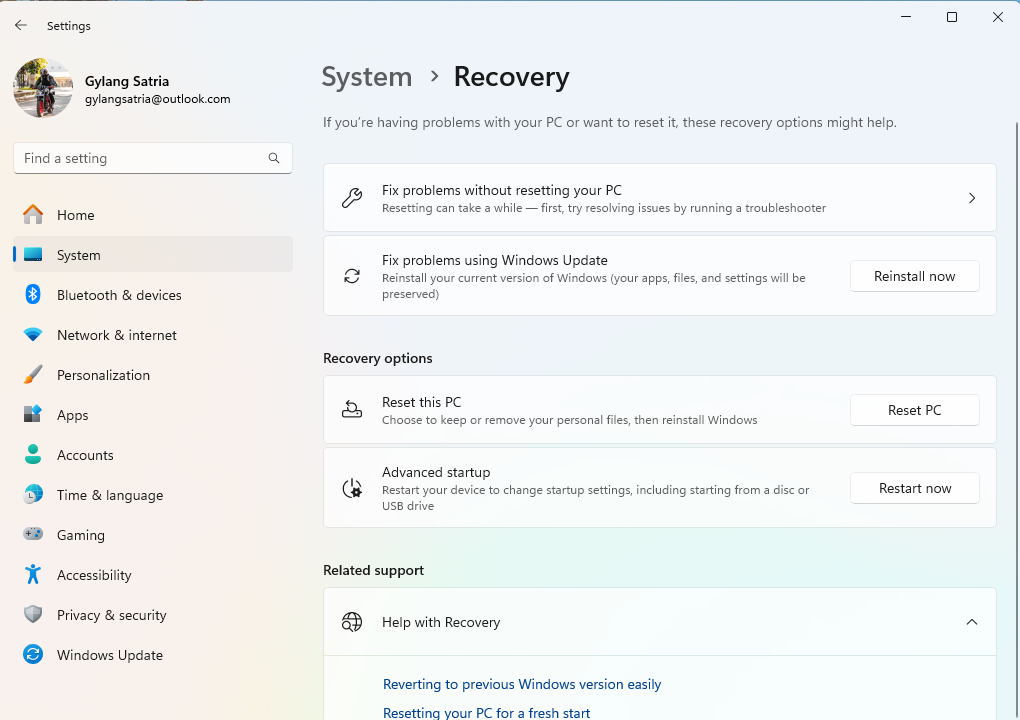
Step 2. On this page, click Reset PC under the Recovery options.
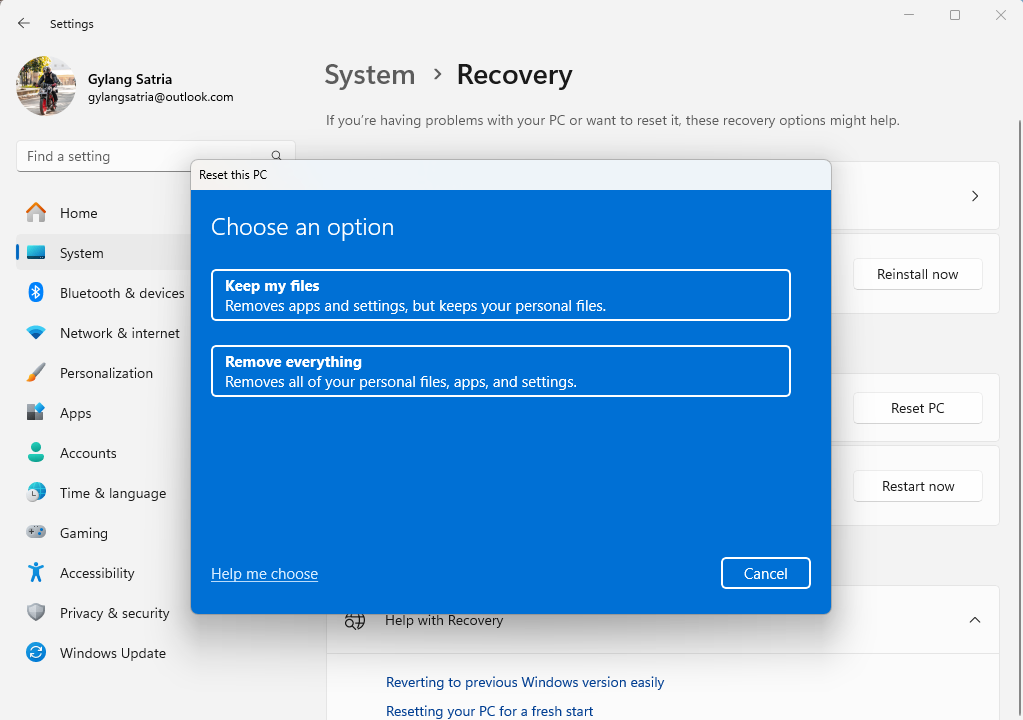
Here, you’ll have two choices: Keep my files to preserve all files in the home folder, or Remove everything, which will completely restore the local disk C to its original state, leaving only system default files.
*Since the device I’m using will be sold, I chose Remove everything.
Step 3. Next, select the reset method you prefer: Cloud download or Local reinstall.
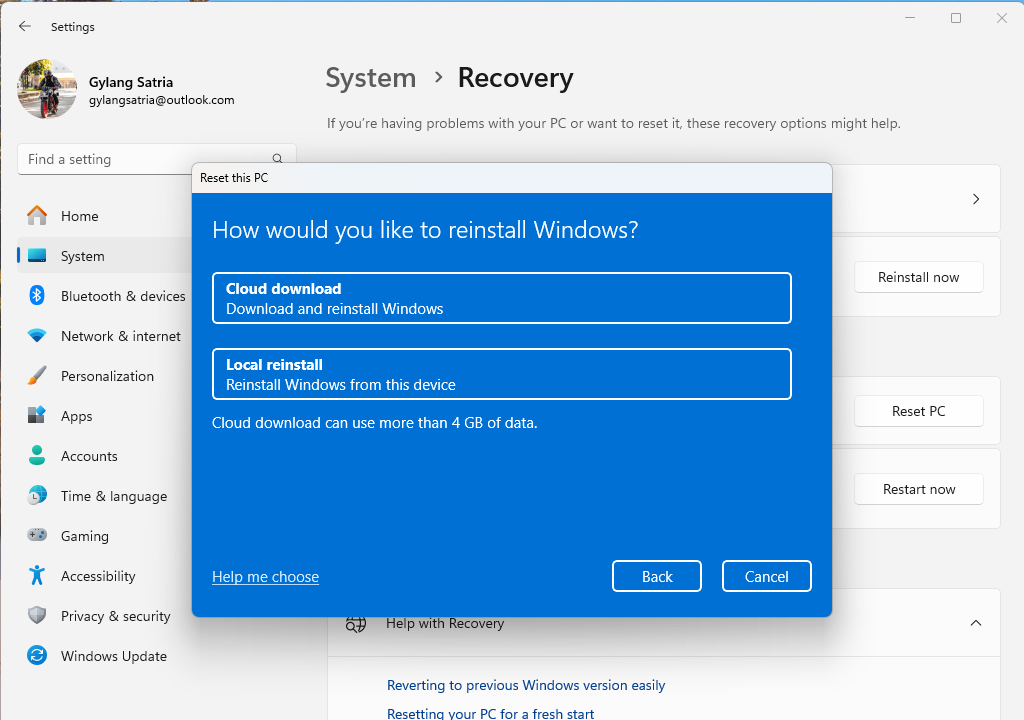
If your system is stable and free of issues, you can choose local reinstall, which doesn’t require a new system image and operates locally using the existing one.
However, if your system is crashing or has corrupted components, opt for cloud download, which updates the system image based on the latest Windows 11 ISO file from Microsoft. Keep in mind this involves downloading approximately 4 GB of data, so ensure your internet quota is sufficient.
*Here, I selected the local reinstall option.
Step 4. Next, double-check the settings for this process, and if everything is correct, click Next.
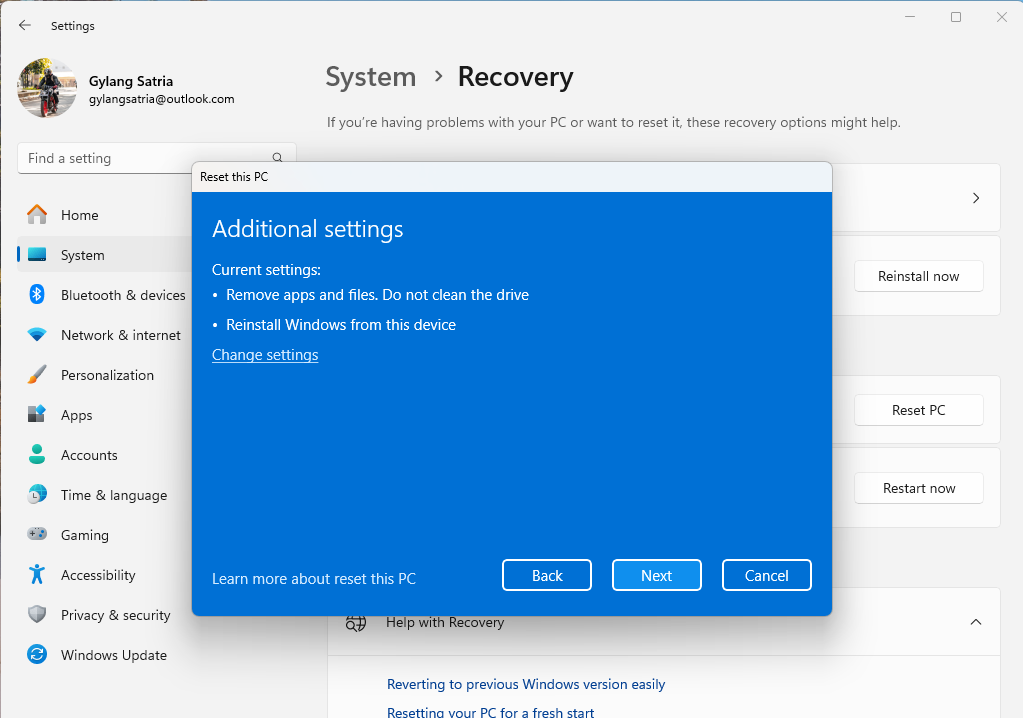
After this, the loading process will begin.
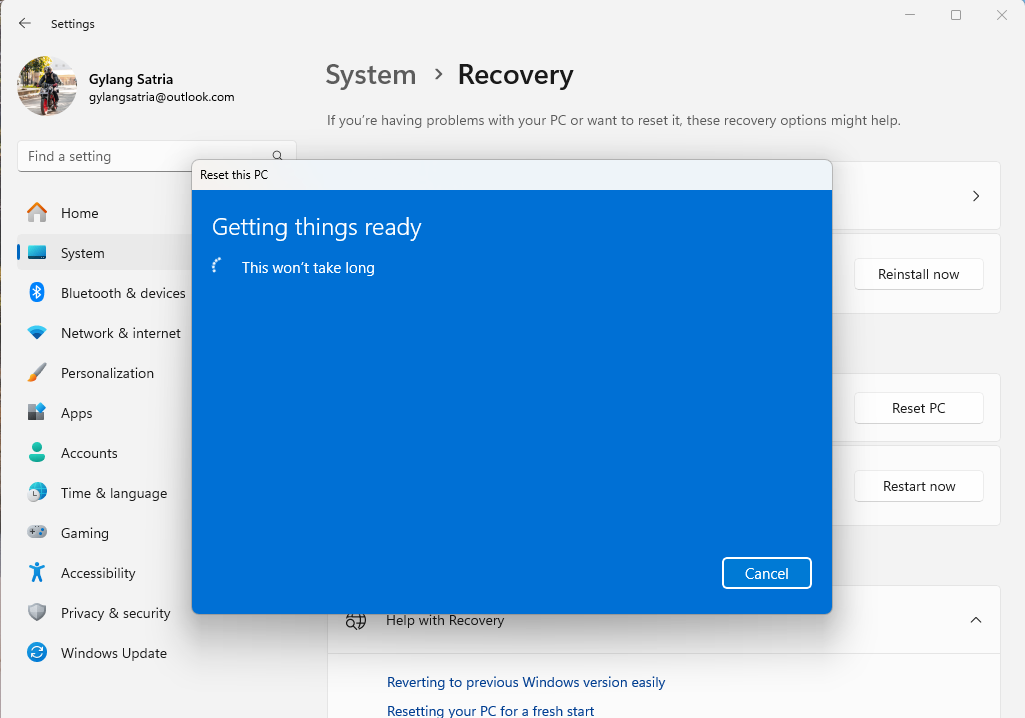
Step 5. Finally, a confirmation window will appear. Ensure you’ve read everything and that it aligns with your needs.
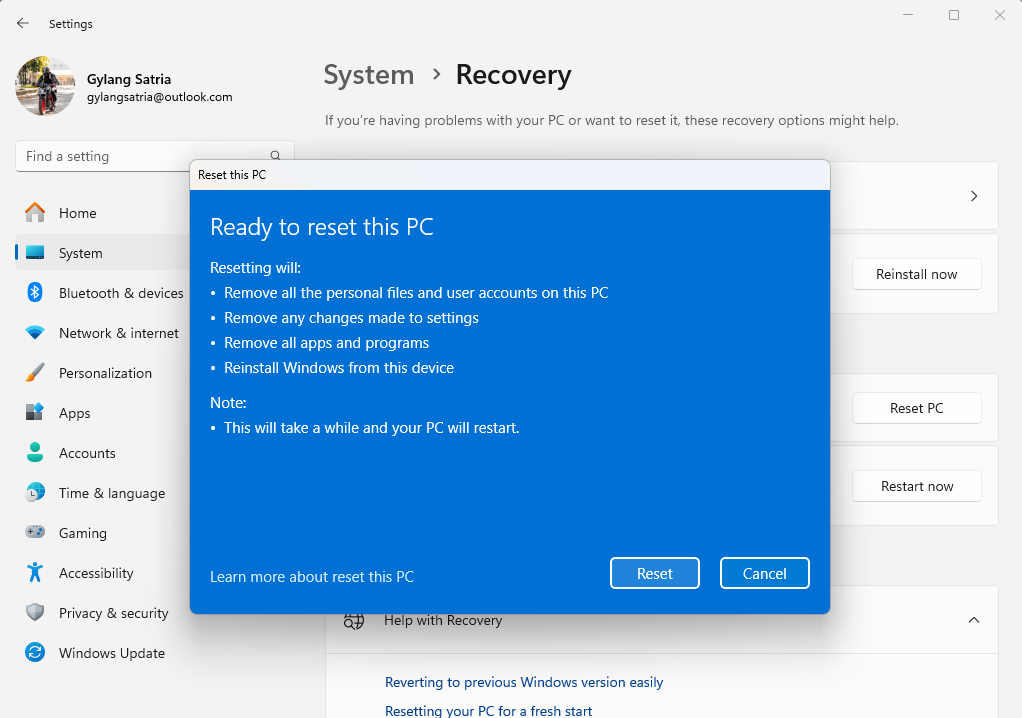
Once confirmed, click Reset to initiate the process. A lengthy preparing loading phase will follow, depending on your device’s specifications (and internet connection if you chose cloud reinstall).
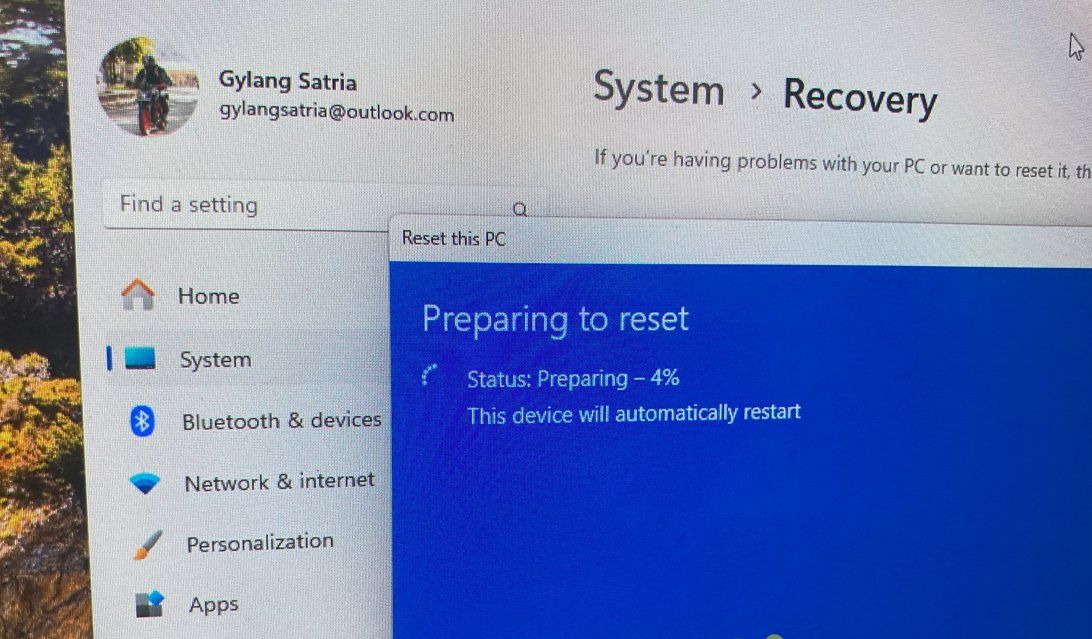
Once completed, the device will restart, and the reset process will begin.
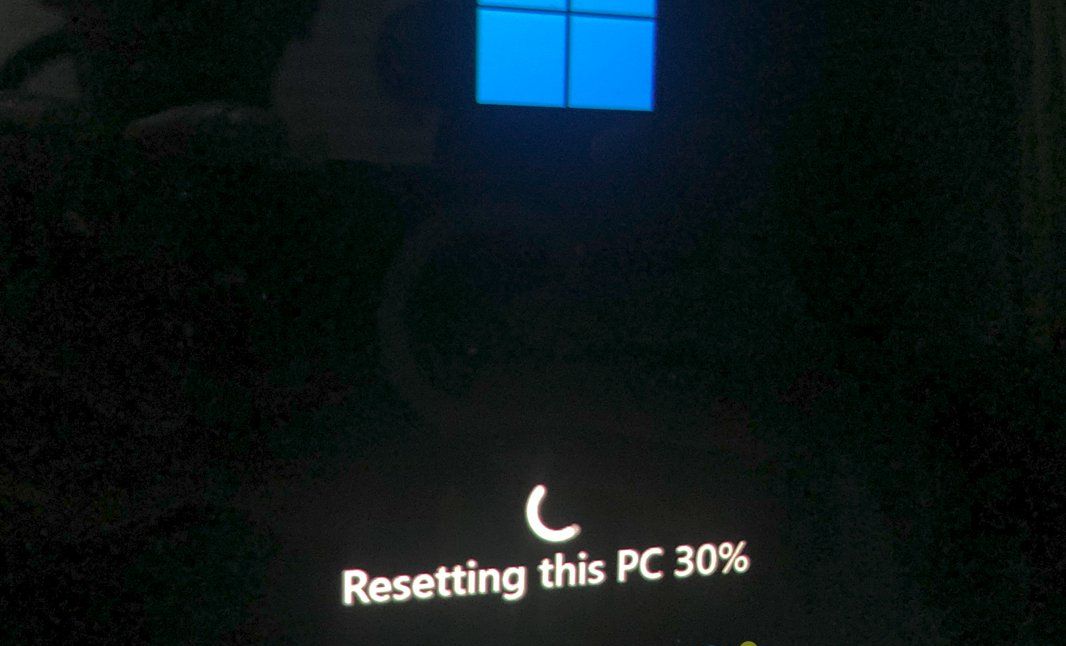
The system will then start again from the OOBE (Out Of Box Experience) process. You can proceed with the usual setup until completion, after which the system will be as good as new, with empty files and only the default Windows 11 applications available.
That’s it for resetting Windows 11. You can follow the OOBE process as prompted. I hope this guide proves helpful. Thank you.

