For users of Windows, Linux, and Mac operating systems, creating multiple partitions can be a practical way to manage files efficiently. By having several partitions, you can separate system files from personal files, making it easier to locate and organize them.
Typically, you can create partitions using various tools such as the command prompt with diskpart, third-party applications like Minitool Partition Master, or the built-in Disk Management utility.
In this article, dgdig will guide you on how to create a new partition in Windows 11 by splitting an existing partition into two: one for the system and another for data. It’s worth noting that most laptop manufacturers typically create a single primary partition for the system. However, if your storage size is large enough, such as 500 GB, you can create an additional partition alongside the system partition.
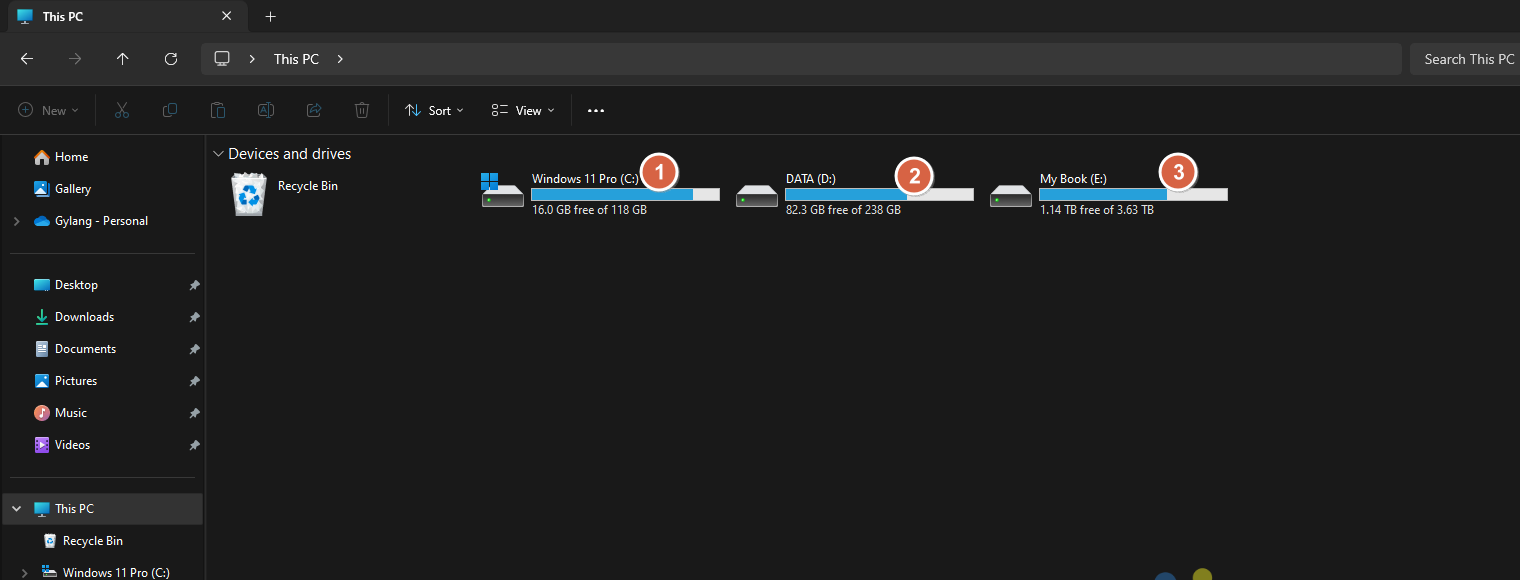
Here are the steps to follow:
Step 1. First, open Disk Management by right-clicking the Start menu and selecting Disk Management.

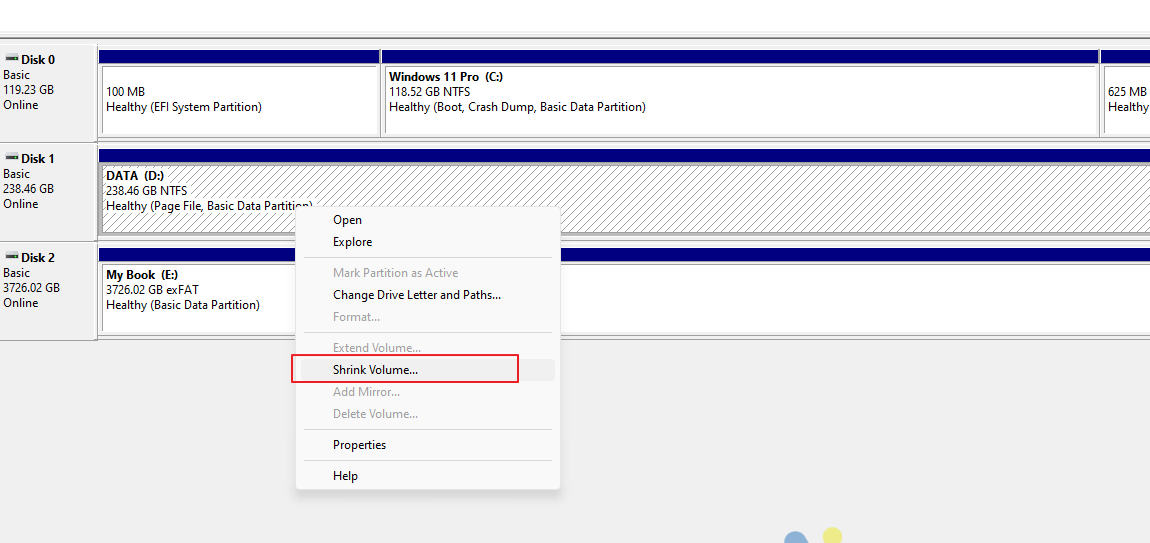
Step 2. Next, select the partition you want to split, right-click it, and choose Shrink Volume.
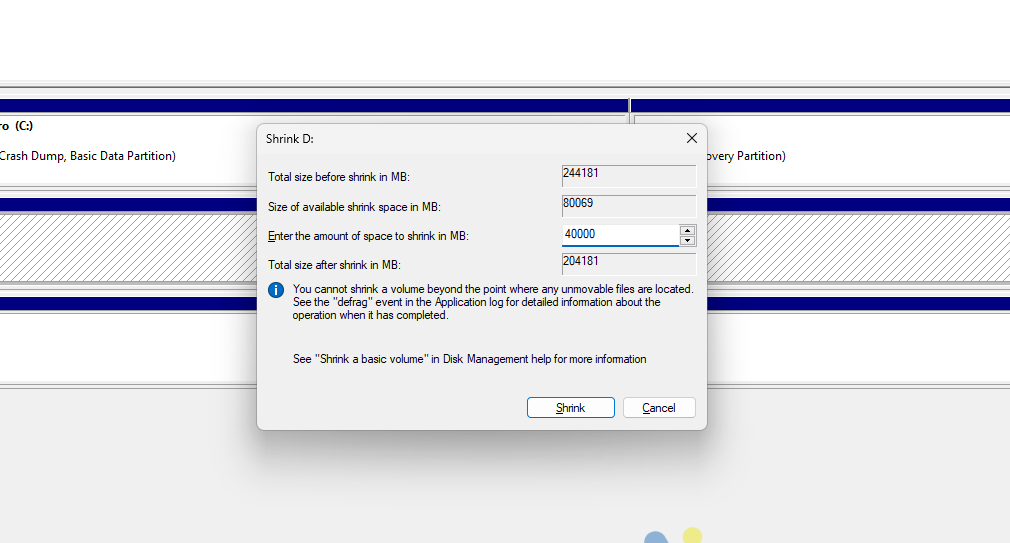
Step 3. Then, specify the size for the new partition, for example, 40000 MB for 40 GB, and click Shrink.
Step 4. Once the new partition is created, you can format it as usual. For detailed instructions, refer to the following page.
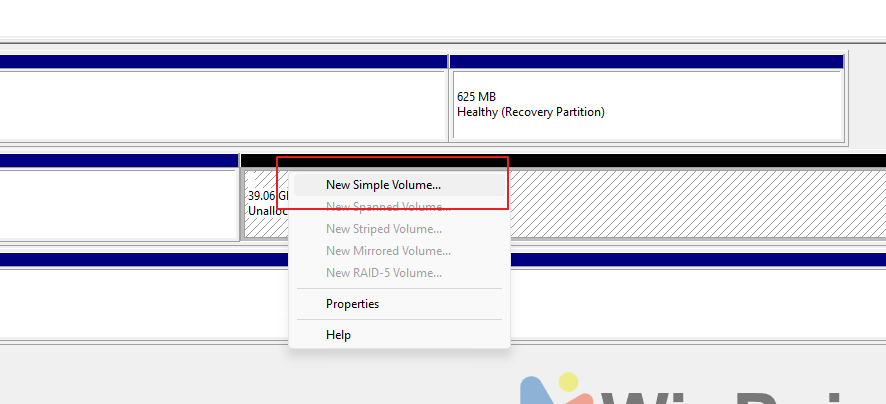
After completing these steps, you will automatically have a new partition created from the original one.
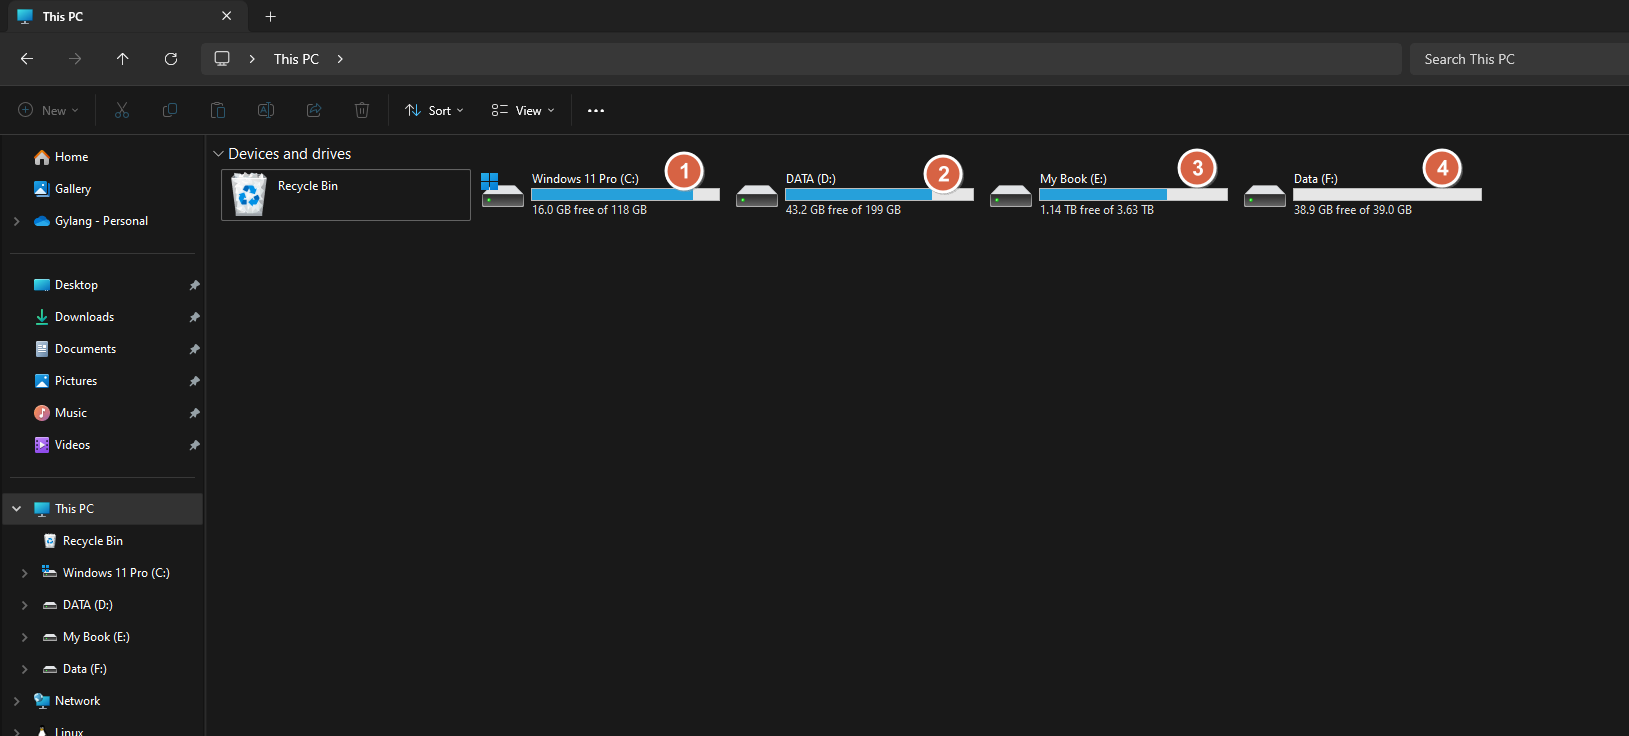
As shown in the image above, the storage size of Drive 2 has decreased by approximately 40 GB, and a new Drive 4 has been created.
It’s simple, right? Give it a try, and we hope this article proves helpful. Thank you!

