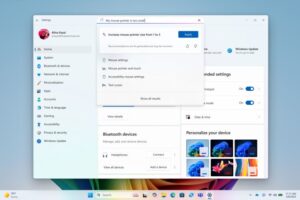
To ensure the privacy of your Microsoft account, creating an additional account can be a practical solution, especially if others will be using your device. This extra account can be configured as either a standard or administrator account, each with its own set of advantages and limitations.
In this article, dgdig will guide you through a quick and simple process to add a new account in Windows 11 for your use.
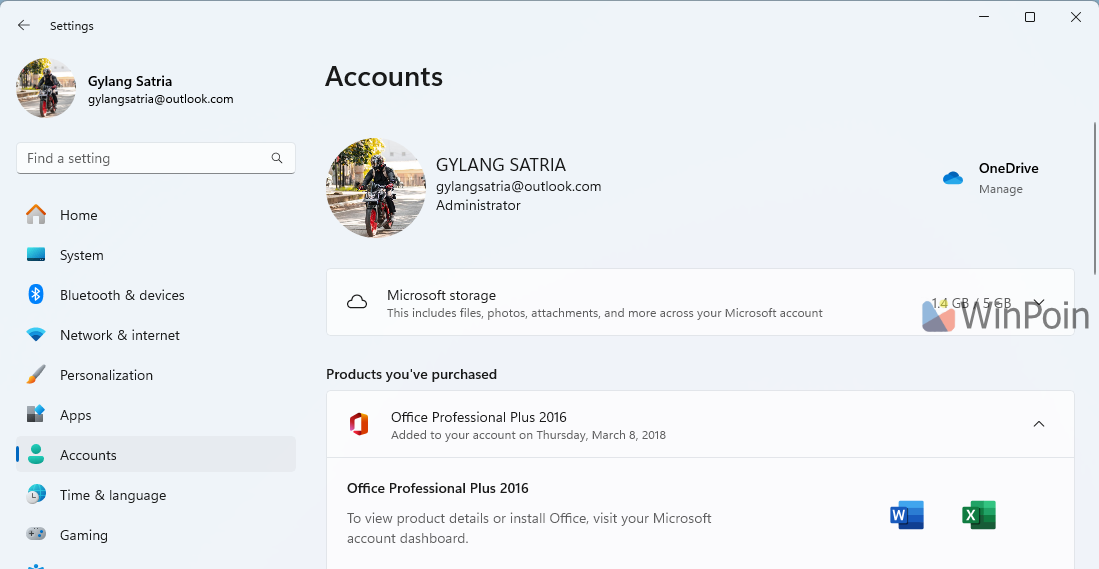
Step 1. First, navigate to Settings > Accounts.
Read Also:
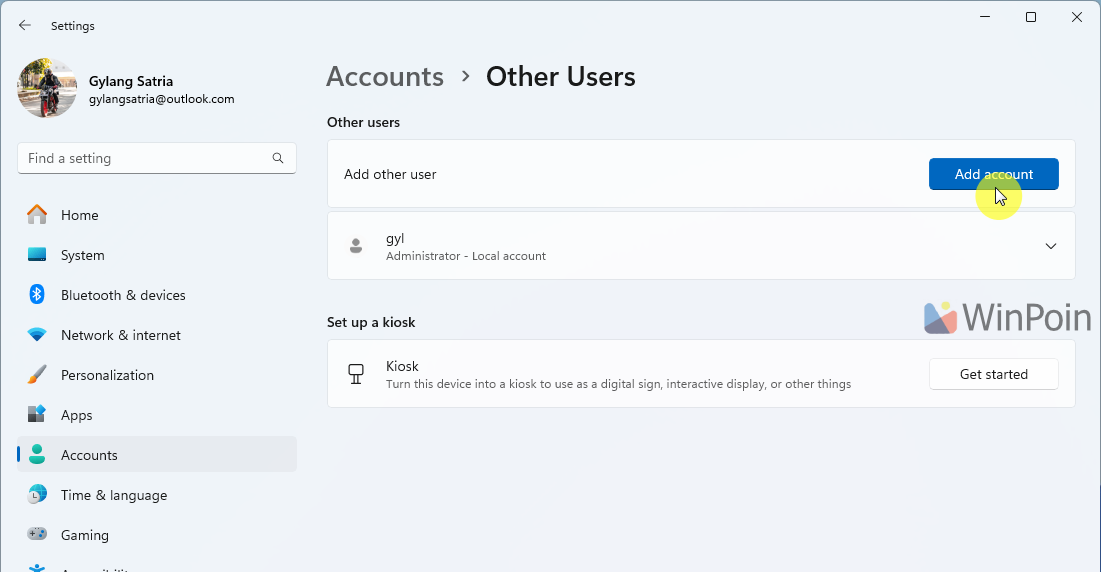
Step 2. Next, select Other users and then click on Add account.
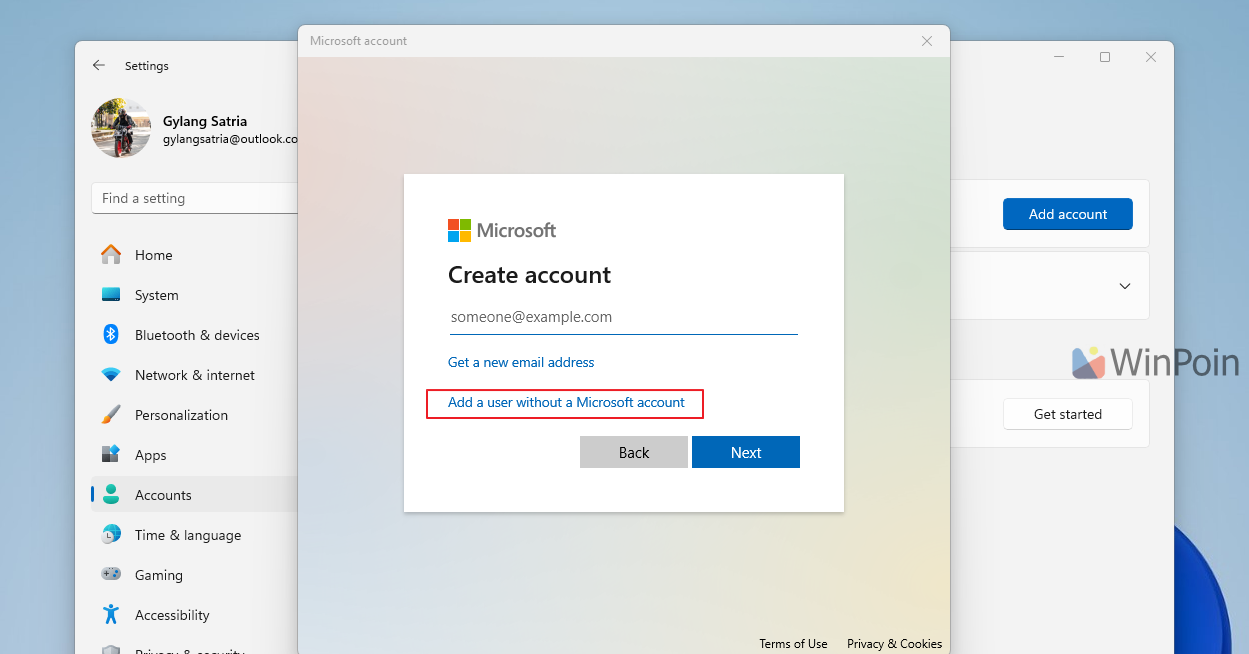
A new window will appear, allowing you to log in with another Microsoft account and follow the standard login instructions. If you prefer to add a local account, click on the “I don’t have this person’s sign-in information” button.
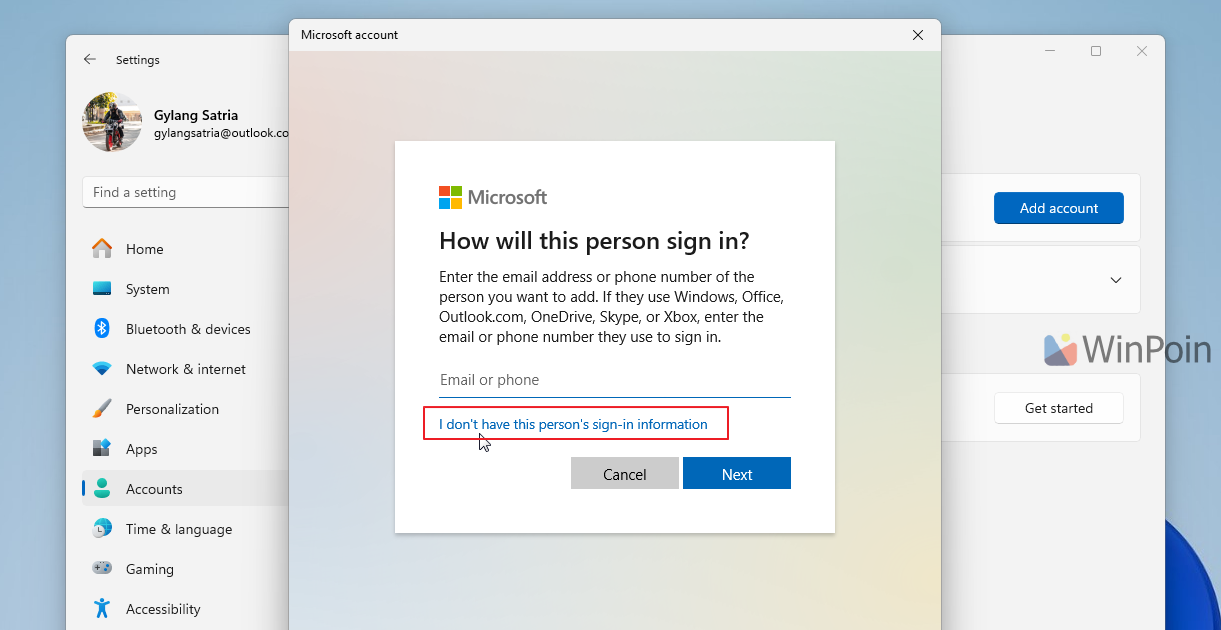
Then, select “Add a user without a Microsoft account”.
Step 3. Now, create a username and password for the new account you are adding.
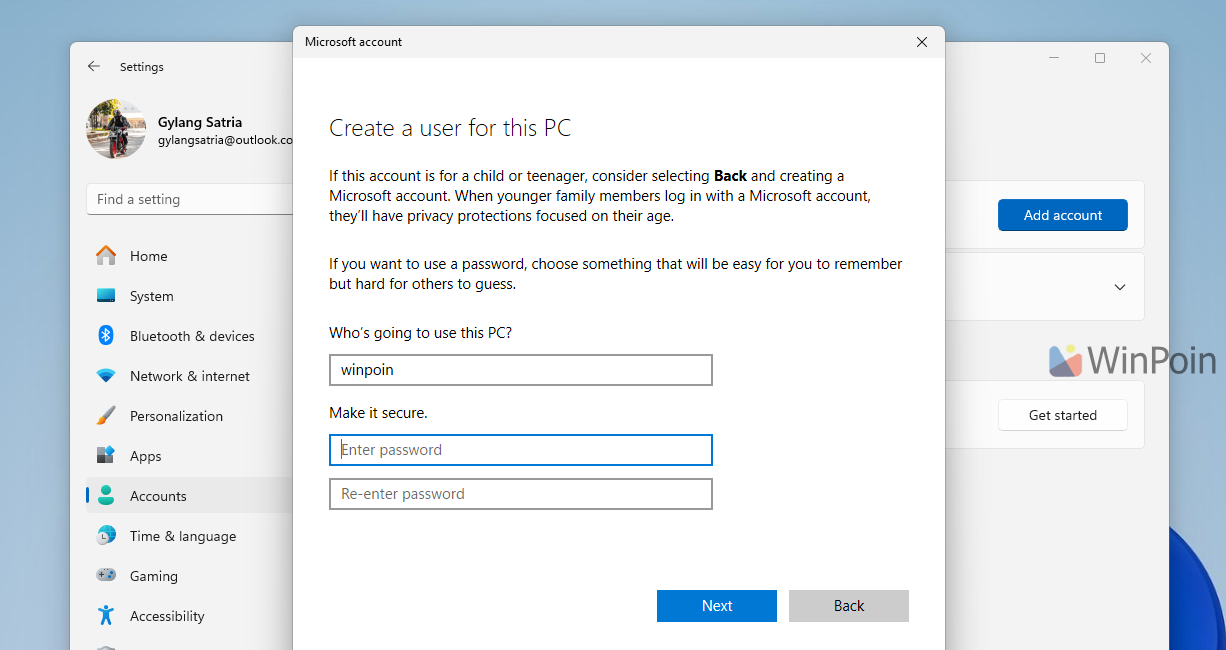
Once you click the Next button, a new account with standard user privileges will be automatically created.
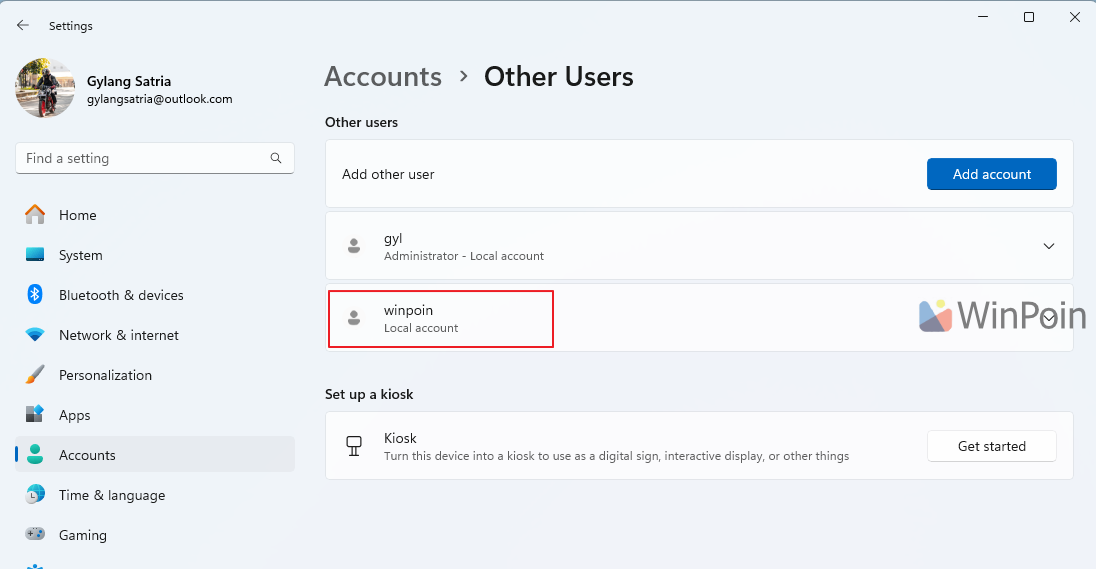
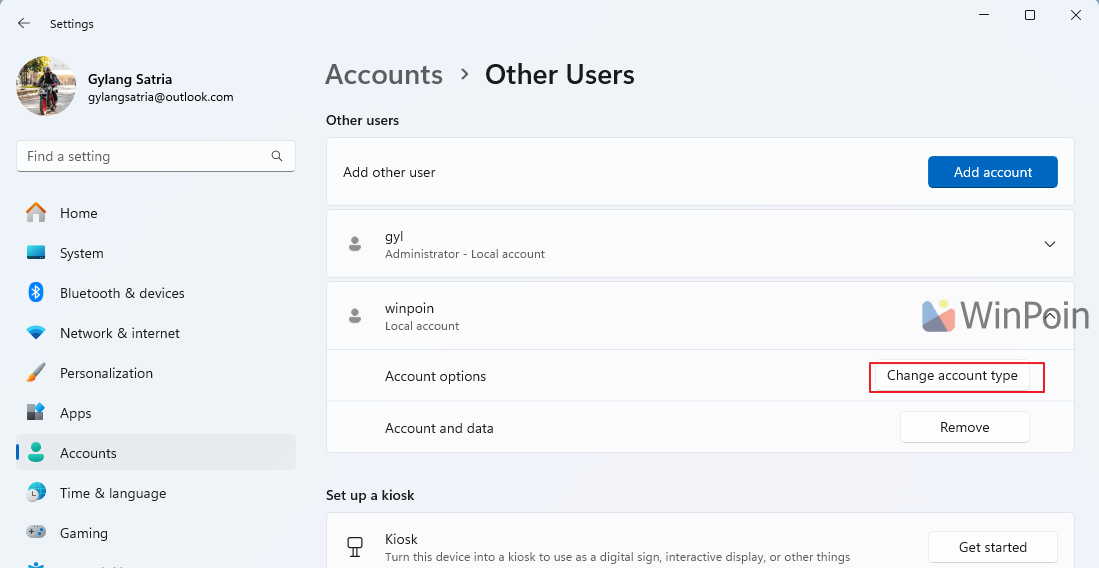
If you wish to change it to an Administrator account, click on the arrow and select change account type.
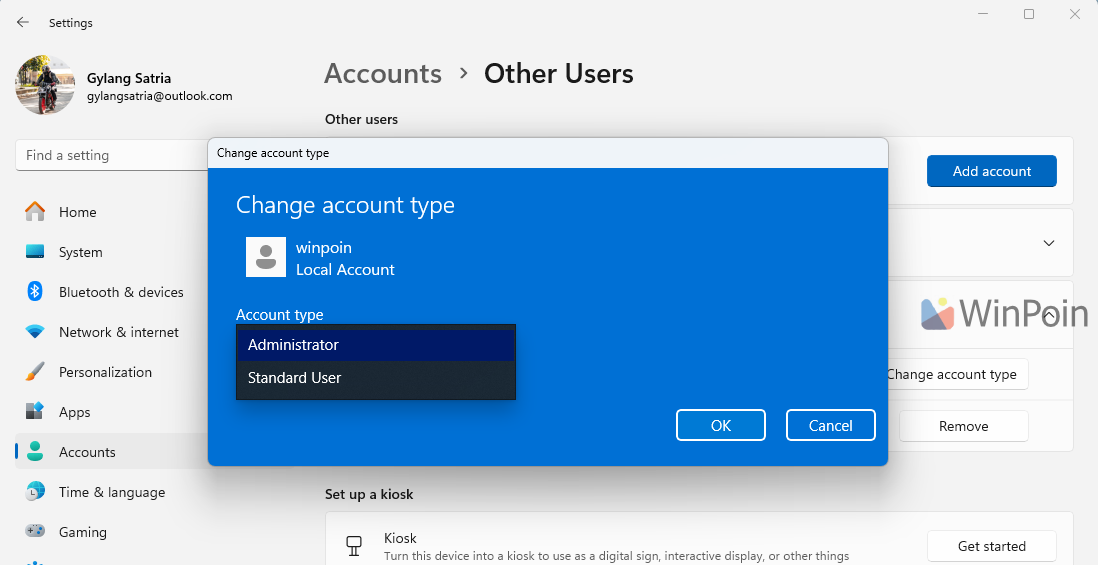
After the account is set up, you can either sign-out from your current account and sign-in with the new one, or log in directly without signing out first.

So, how about it? Adding a new account in Windows 11 is incredibly straightforward, right? Give it a try and we hope this article proves to be helpful. Thank you.

