Similar to Windows 10 and earlier versions, you can add and modify the color profile of your monitor to ensure accurate color display.
Generally, some monitor models come with specific color profiles that you can download from the official website of the monitor brand. However, apart from brands providing their color profiles directly, users can also create and share their preferred color profiles for specific monitor models. This article outlines the steps to find and install a color profile on Windows 11.
Step 1. First, visit the Rtings website and search for the monitor you are using.
Step 2. Next, download the color profile from the site as shown in the image below.
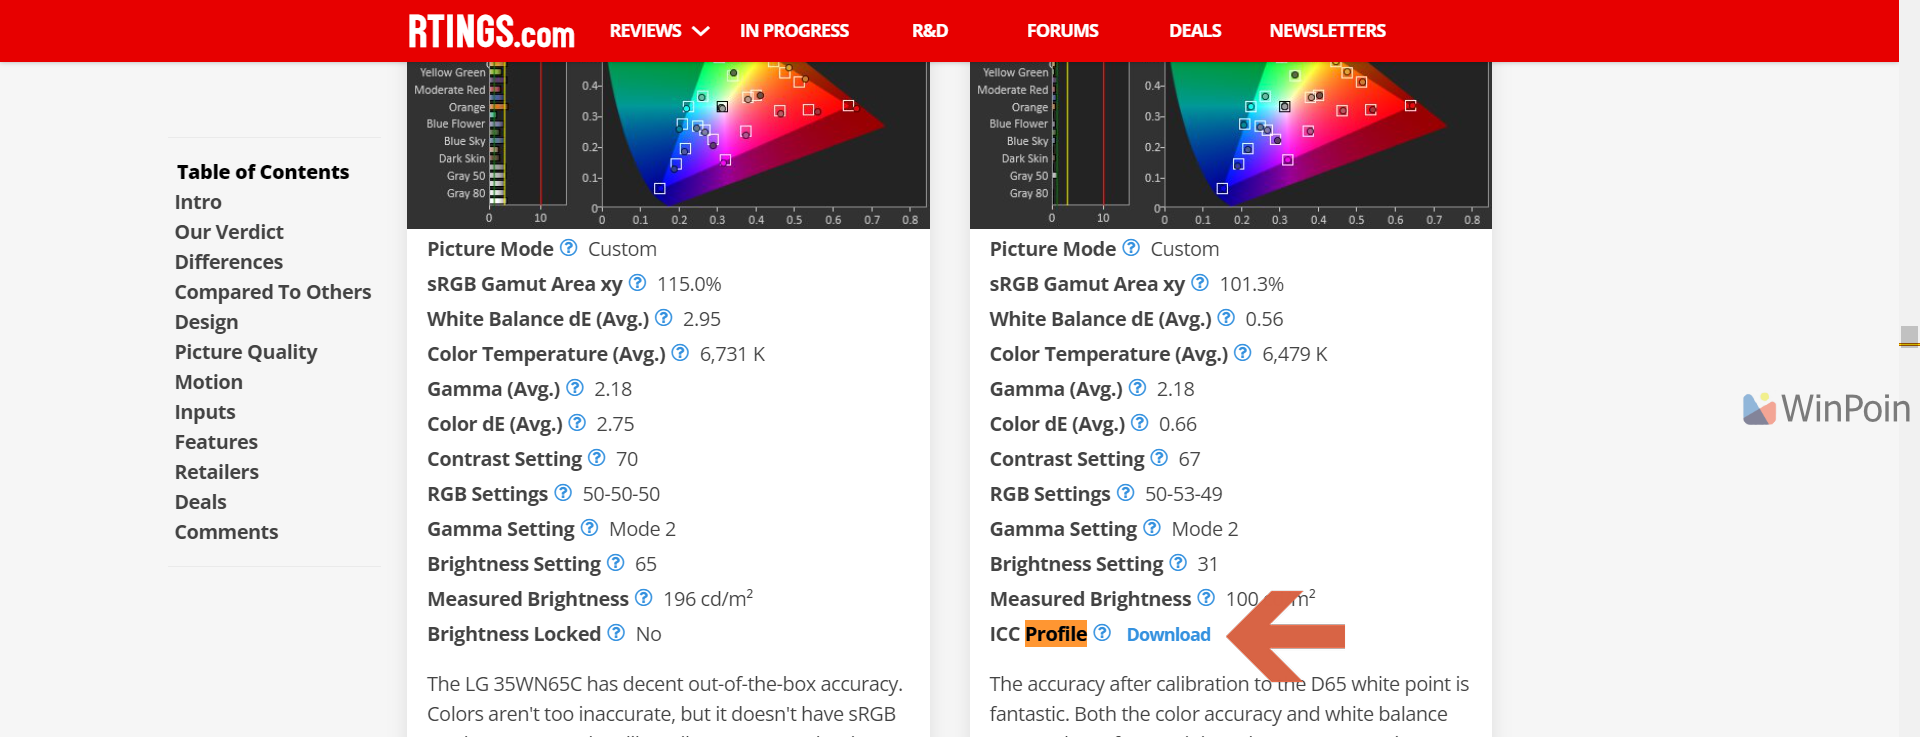
Alternatively, you can search for your monitor’s ICC Profile on other websites.
Step 3. After saving the profile, open the Settings app > System > Display > Advanced display.
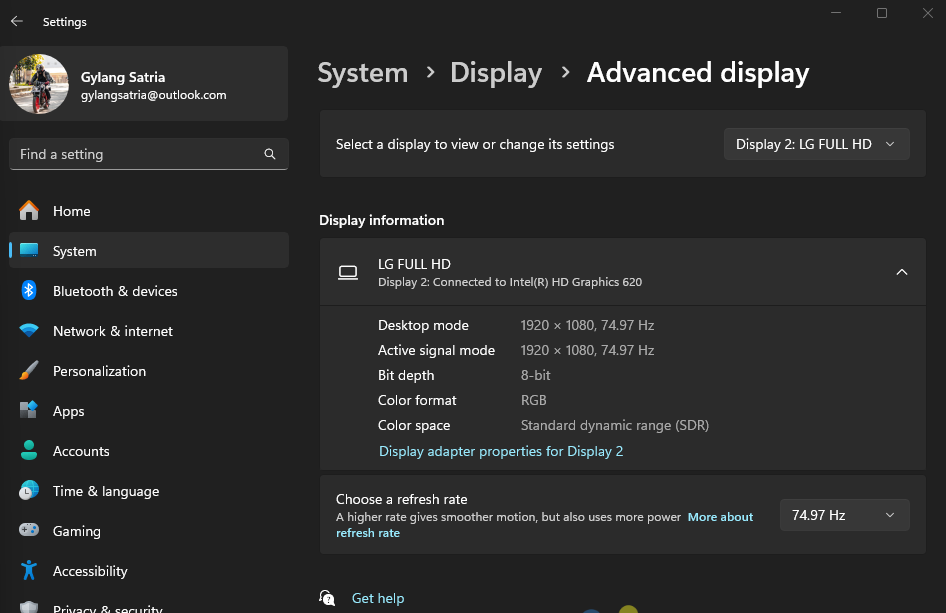
Ensure you select the monitor where you want to apply the downloaded color profile.
Step 4. Click on Display adapter properties for display x > then select the Color Management tab.

Next, click the Color Management button and go to the All Profiles tab.
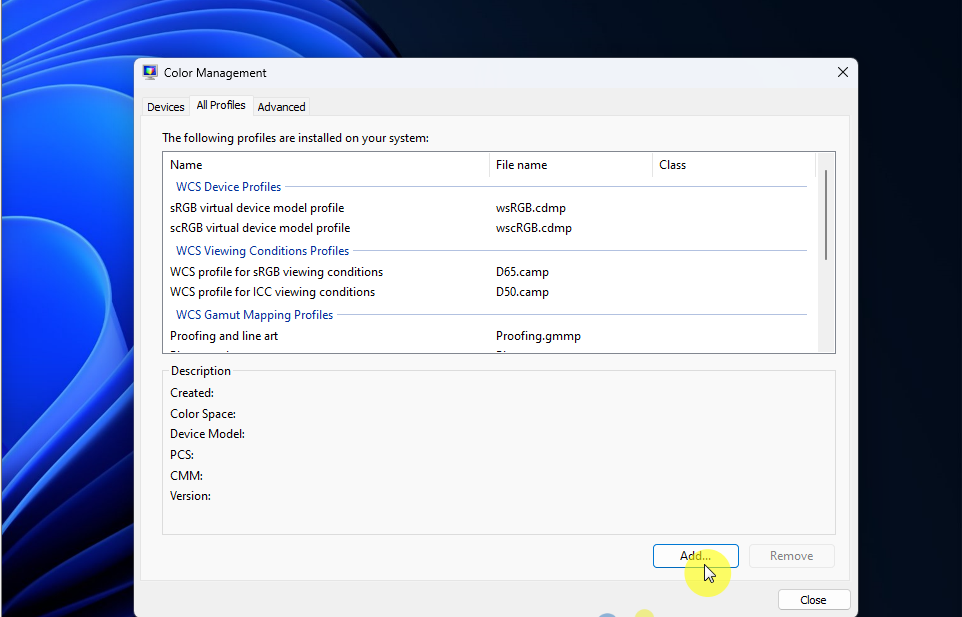
Click Add and include the color profile you downloaded earlier.

After that, click the Advanced tab and select Change system default.
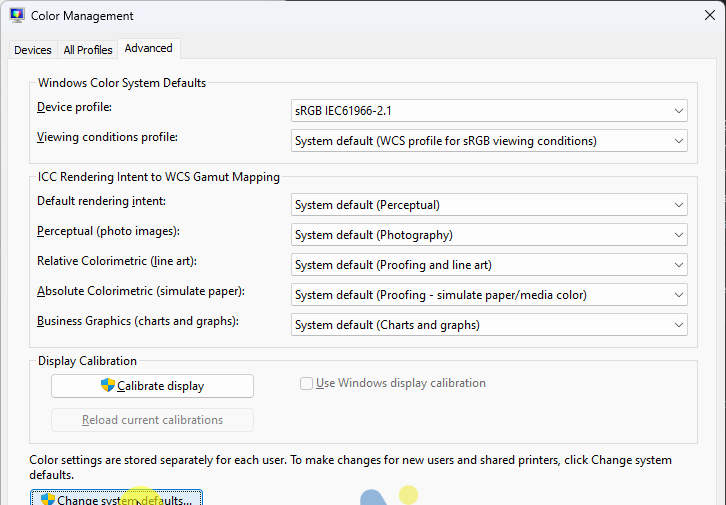
Then, click Add and choose the profile you added previously.
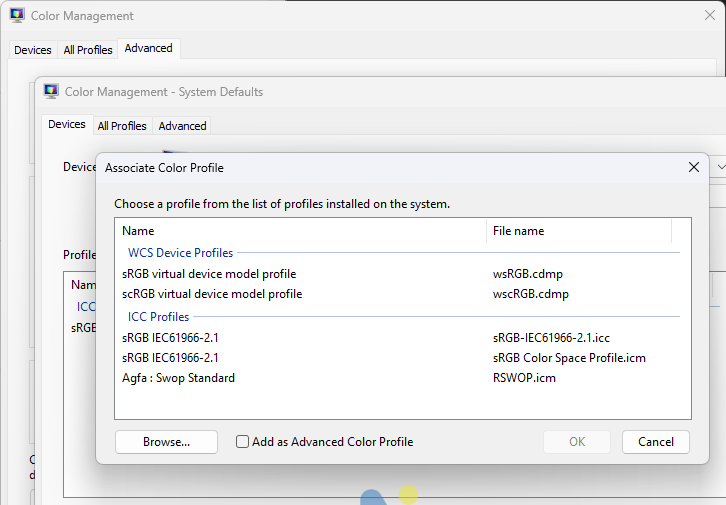
Finally, click Set system default.
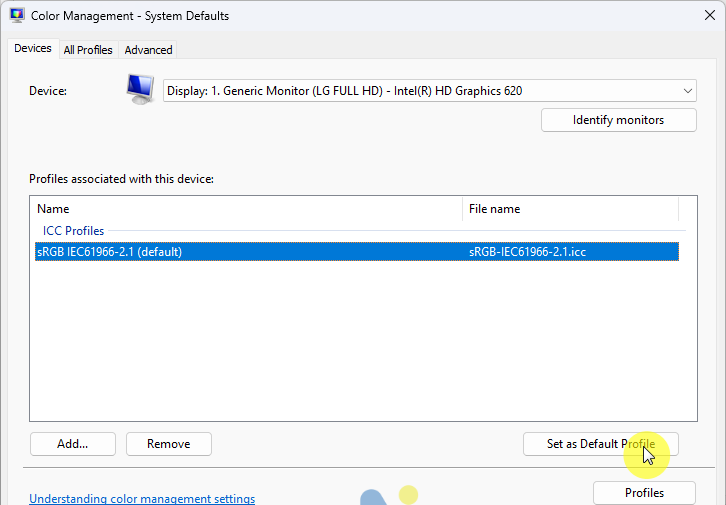
And you’re done.
Give it a try, and by the way, starting with Windows 11 24H2 or later, the process will be even simpler. I’ll update this article later, so stay tuned. Thanks, and I hope this helps!


