Ever wondered how many cores your current processor has? For tech enthusiasts and geeks, this is basic knowledge since identifying the brand and model of the processor typically makes it straightforward.
But did you know that apart from checking the official processor provider’s website, you can also find out the number of processor cores directly from Windows 11?
Knowing the number of cores in your processor can be useful in various situations, especially when working with virtual machines or applications that demand extra power. Additionally, some CPUs support Hyper-threading, allowing two instructions per core to be processed simultaneously.
Read Also: Latest Leak: Intel Disables Hyper-Threading in Newest Processor Generation
Below are some methods to determine the number of processor cores in Windows 11.
Read Also:
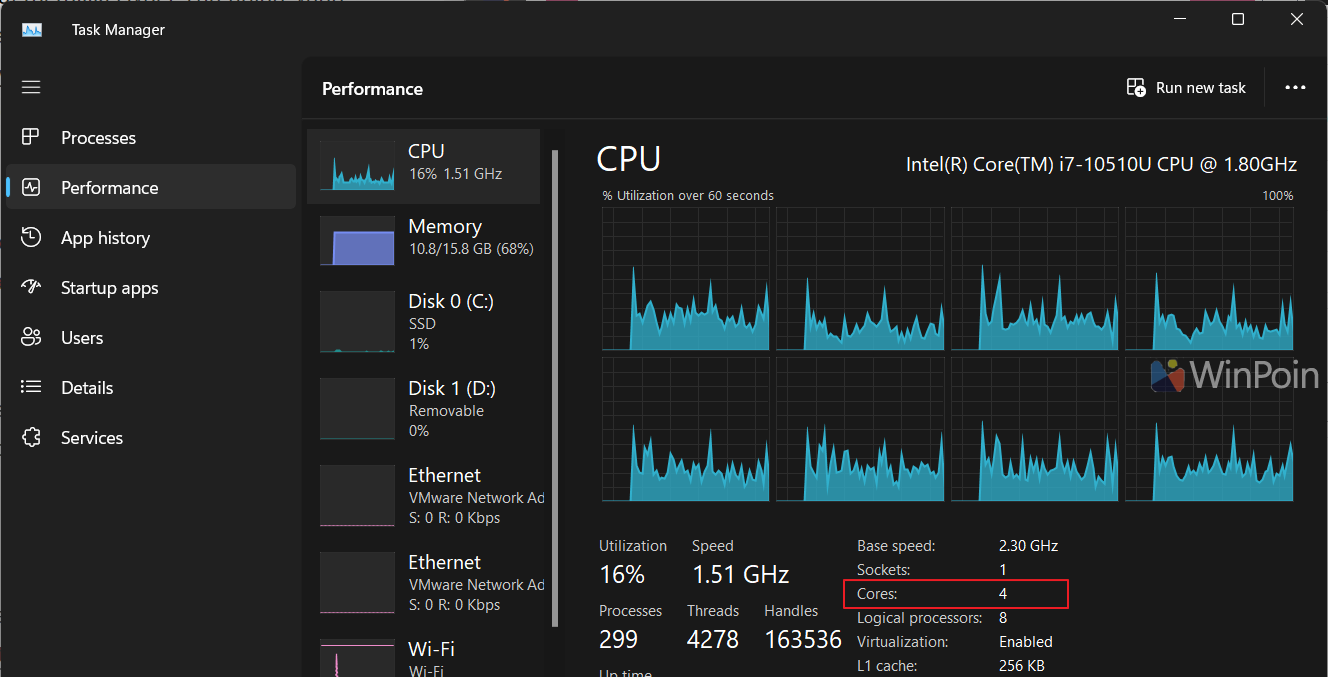
The simplest and most common approach is to open Task Manager. Under Task Manager > Performance > CPU, you can view the model, core count, and logical processors (hyper-threads) if available.
As shown in the image above, you can see that I’m using an Intel Core i7 10510U processor with 4 cores that supports Hyper-threading (Logical Processor).
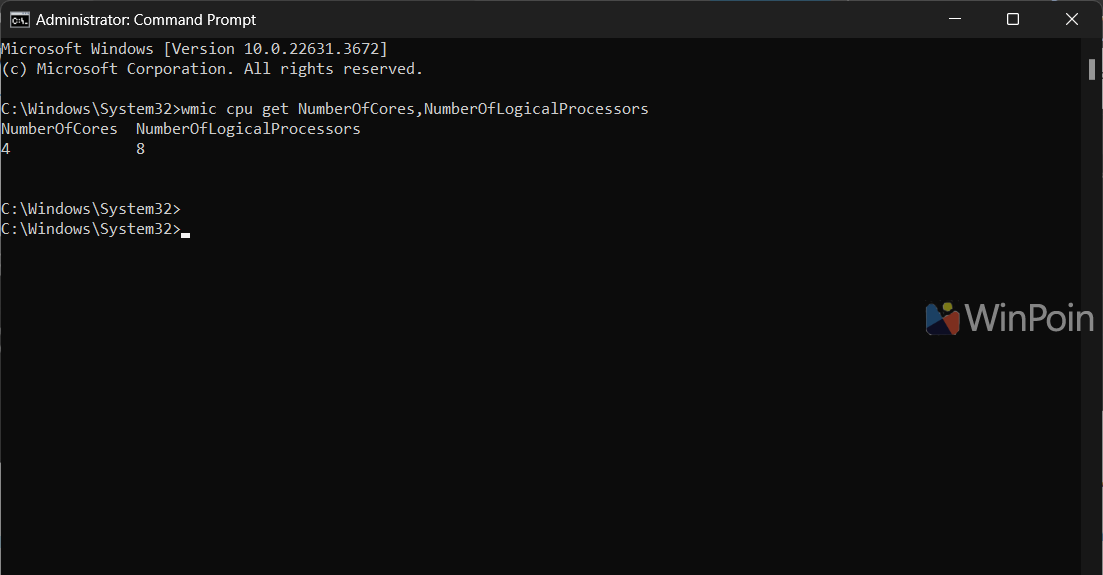
Alternatively, you can use Command Prompt (run as Administrator) and enter the following command:
This command will display details such as the number of cores and Hyper-threading, if applicable.
Similarly, PowerShell can also be used to determine the number of processor cores. Simply input the following command to retrieve this information.
Afterward, you can view the core count of your processor.
Easy, right? These three methods are effective for checking the number of processor cores on Windows 11. For detailed specifications, however, it’s advisable to visit the processor provider’s official website.
Nah contoh dari perintah tersebut akan menampilkan informasi berupa jumlah core dan hyper-threading jika tersedia.
Sama seperti Command Prompt, kita juga dapat mengandalkan PowerShell untuk mengetahui jumlah core procesor yang kita gunakan. Cukup masukan saja perintah berikut untuk mengetahui informasi tersebut.
Setelah itu kamu bisa melihat informasi dari jumlah core procesor yang kamu gunakan.
Mudah bukan?, umumnya tiga cara diatas bisa kamu manfaatkan untuk mengetahui jumlah processor yang kamu gunakan saat ini di Windows 11. Namun untuk melihat detail spesifikasi dari processor tersebut, ada baiknya kamu melihat langsung pada situs penyedia processor tersebut.