Typically, our devices only require a single IP address to connect to a network. However, it’s possible to assign multiple IP addresses, which offers several advantages.
One key benefit is enhanced security. By utilizing multiple IPs, a website can have several addresses. If a firewall blocks one of them, the site remains accessible through another IP.

So, how do you configure multiple IPs in Windows 11? If you’re curious, here’s a quick guide summarized by dgdig.
Step 1. First, navigate to Settings > Network & Internet.
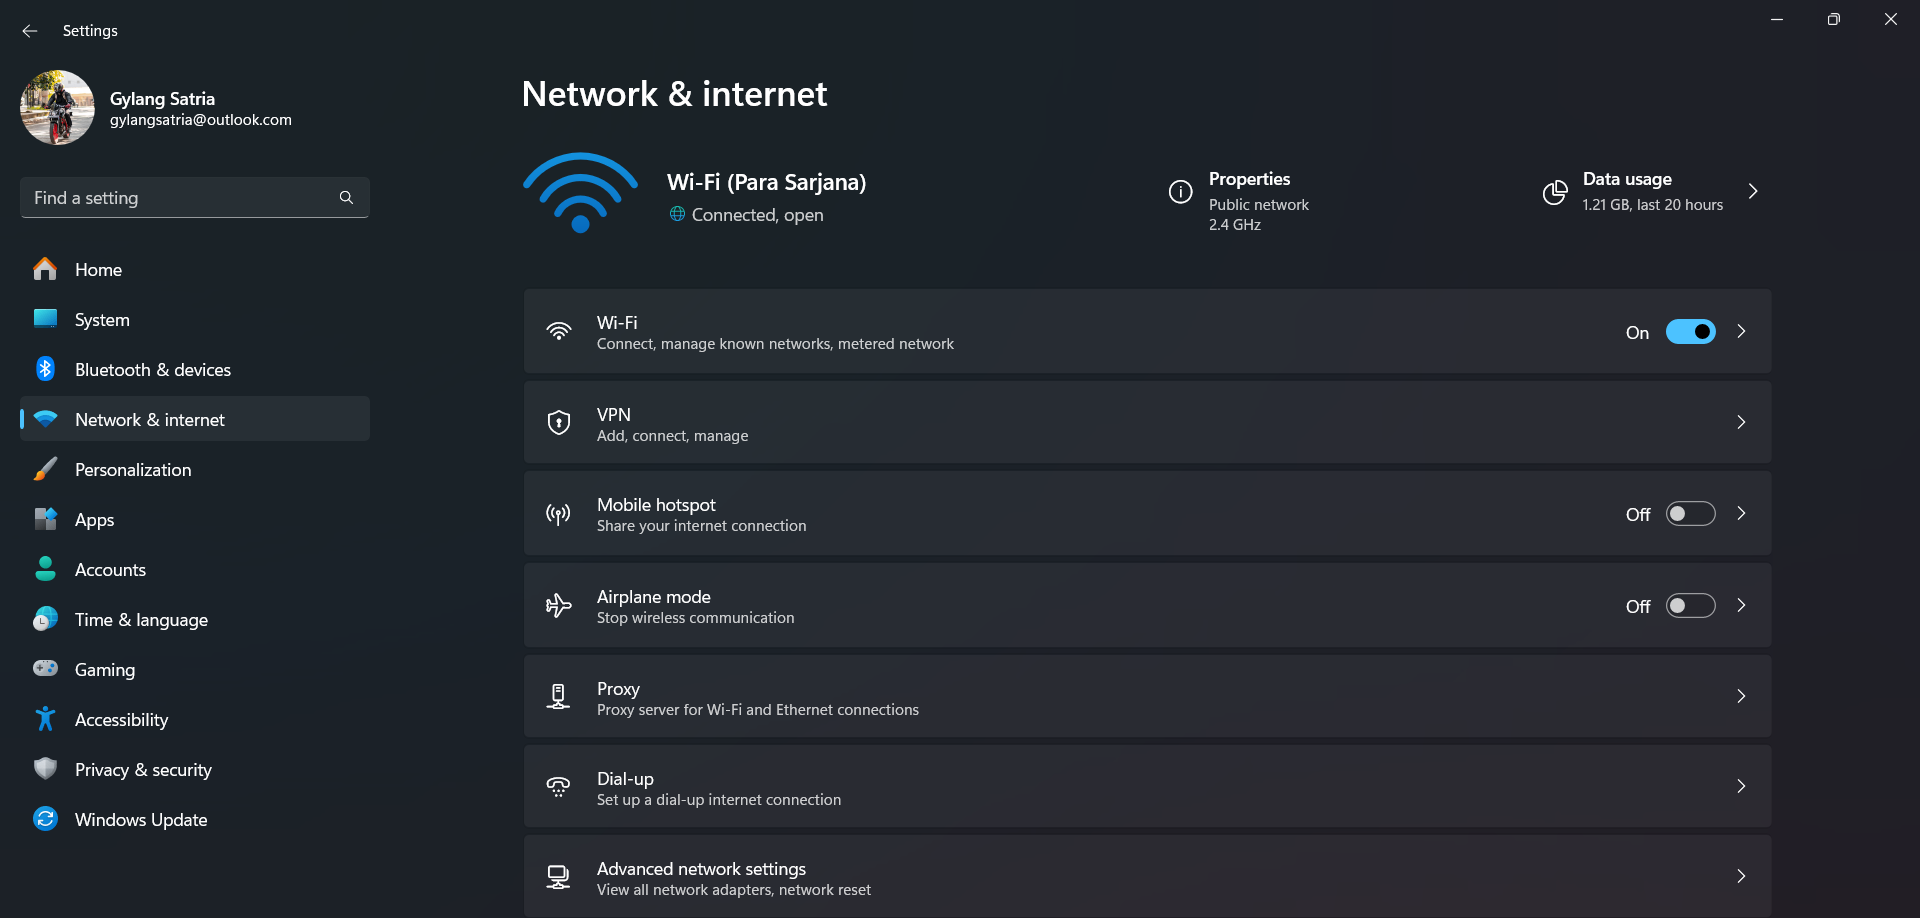
Step 2. Next, go to Advanced network settings, select the adapter you’re using, and click on Edit in More adapter options.

Step 3. Then, choose IPv4 and click Properties.
Adjust the IP settings to static by configuring the IP according to your network router.
Also Read : How to Set a Static IP in Windows 11
Afterward, click Advanced, then select Add.
Finally, click Ok to save the changes.
Here’s the result.
Below is the outcome of the ipconfig command in Command Prompt.
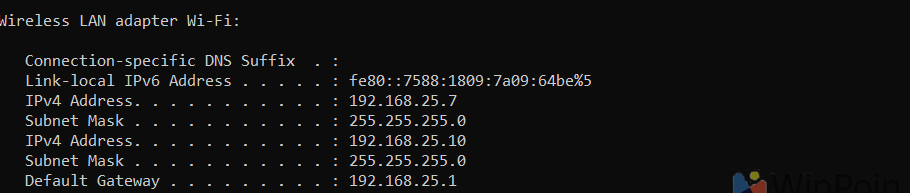
That’s it! Your system is now using multiple IPs. Ensure these IPs don’t conflict with other devices to avoid network issues.
Give it a try, and we hope this article proves useful. Thank you.