Previously, we explored How to Adjust Storage Allocation for the Recall Feature in Windows 11 and How to Disable the Recall Feature in Windows 11. But is it possible to delete the snapshots captured by Recall?
The answer is yes. Through the Settings page, you can remove snapshots saved by the Recall feature either for a specific timeframe or all of them.
Also Read: Recall Feature in Windows 11 Successfully Ported to Snapdragon 7c+
Deleting snapshots will reset the Recall function, meaning all keywords and search processes will start from scratch. It’s recommended to delete snapshots only if the storage used by Recall becomes excessive or if you no longer wish to use the feature. Below is a guide on how to delete Recall snapshots in Windows 11:
Step 1. Open Settings > Privacy & security > Recall & snapshot.
Read Also:
Step 2. Here, you have two options: delete all snapshots by clicking the Delete all button or remove snapshots based on a specific timeframe.
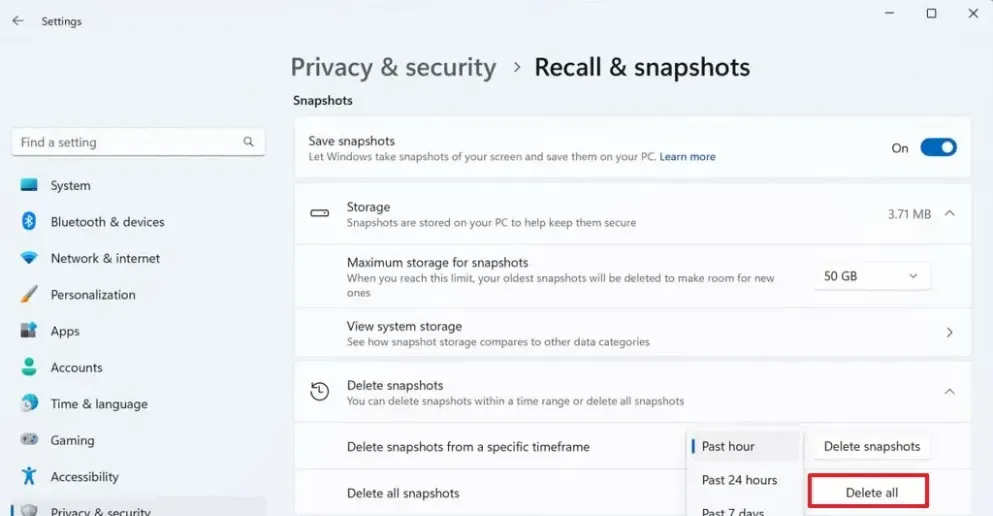
Choosing the Delete all option will erase all snapshots taken by Recall, immediately freeing up storage space.
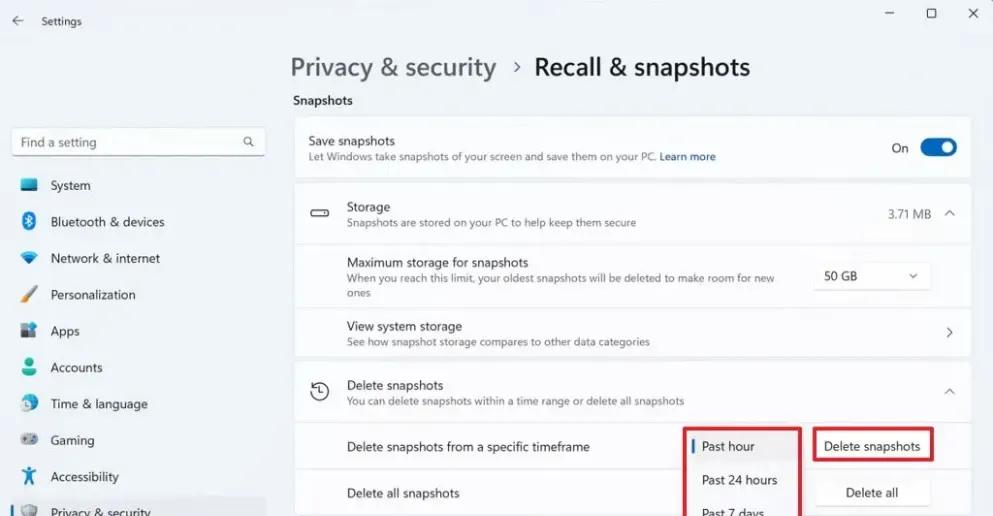
Alternatively, if you opt for timeline-based deletion, you can remove snapshots from the last hour, last 24 hours, or even the last 30 days.
Once snapshots are deleted, the Recall feature won’t be able to retrieve previous activities. However, if Recall remains active, it will start capturing new snapshots to rebuild its database for future searches.
That’s a quick guide on how to delete Recall snapshots in Windows 11. If you’re interested, you can also explore the List of Keyboard Shortcuts for the Recall Feature in Windows 11.