There are numerous and varied AI services available today. Windows 11 comes with Copilot, but I personally prefer using Deepseek and Gemini. Additionally, there’s Perplexity AI, an AI-powered search engine and assistant that combines natural language processing (NLP) technology with generative models to deliver quick, concise, and relevant answers to user queries.
In other words, Perplexity doesn’t just display a list of links or standard search results; it provides processed and summarized answers, complete with credible source references.
Like other AI models, Perplexity is accessible via the web at https://www.perplexity.ai/. However, if you prefer a system-installed version, you can download Perplexity onto your device.
In this article, dgdig will outline the simple steps to install Perplexity AI directly on Windows 11. Here’s how to do it.
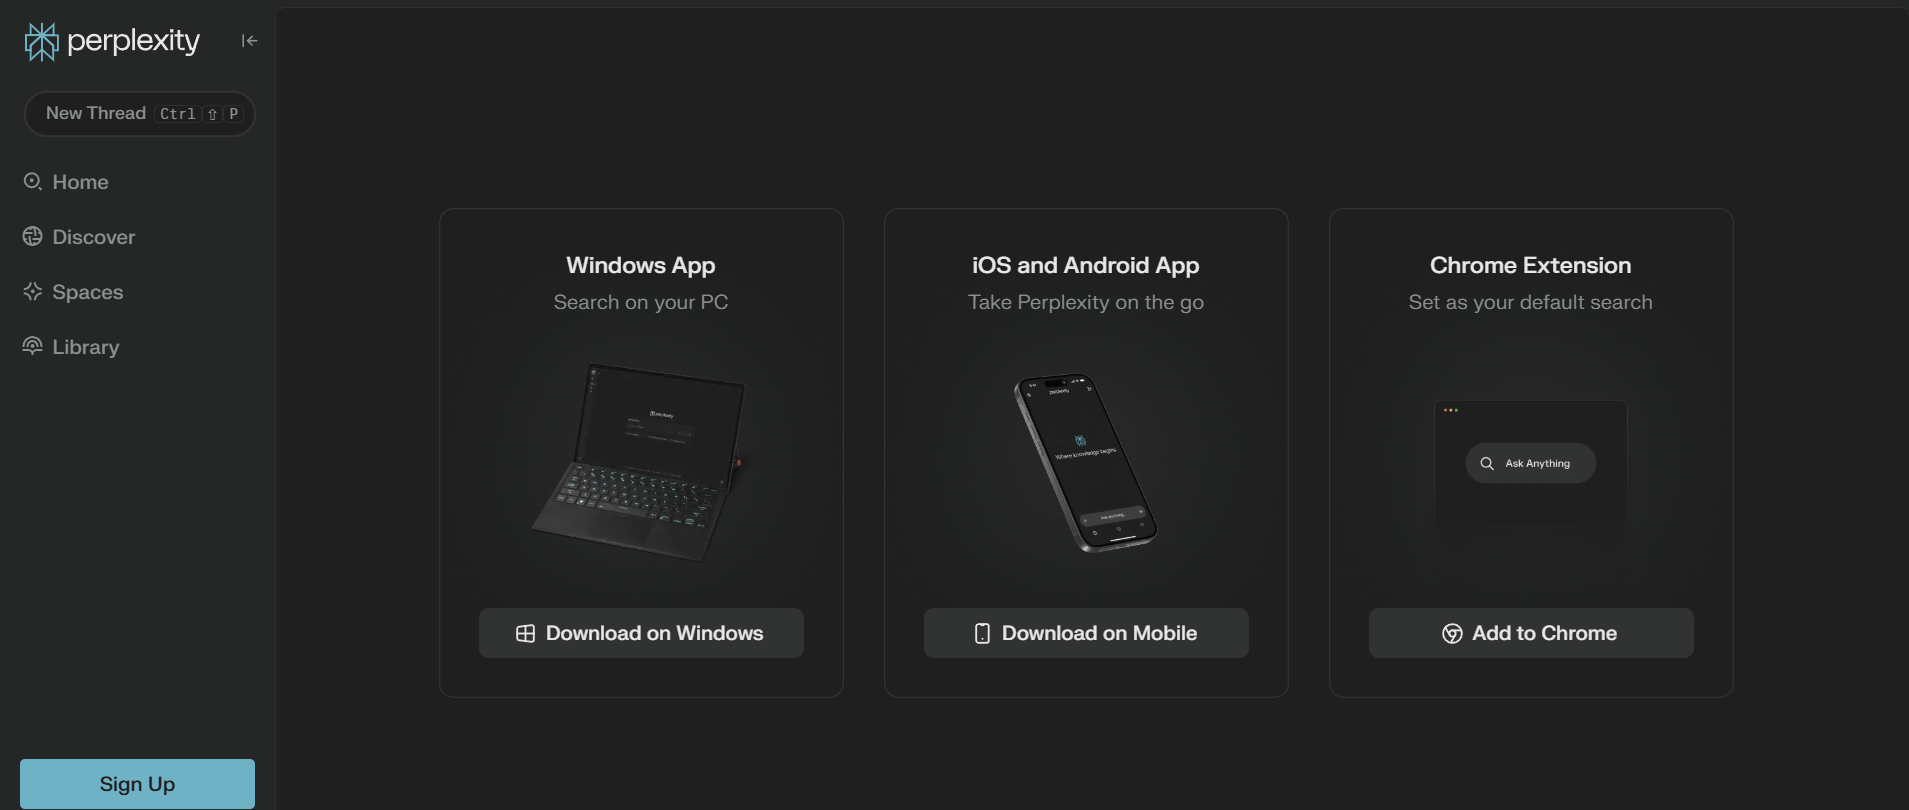
Step 1. First, visit the following page and download the Windows-specific version of Perplexity.
Step 2. Once the installer file is downloaded, open and install it as usual.
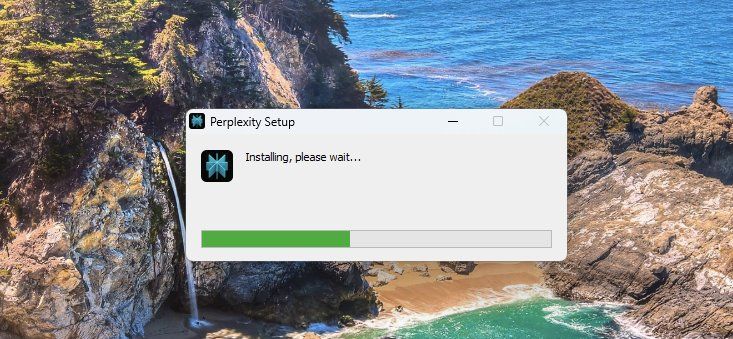
After the installation process completes, Perplexity AI will be ready to use.

Generally, the application features an interface identical to the web version, with a text command section at the front and center, and a sidebar on the left that allows users to access various service sections, such as command history, spaces, discovery, and the home page.
Although the web version is available, the desktop version offers distinct advantages in certain scenarios. It provides a more integrated experience, additional features like improved search history management, potential offline access, and delivers more stable and responsive performance, especially for complex searches or quick access to various features.
Moreover, if your device is equipped with an NPU, AI processing will be slightly more efficient.
That’s a quick guide to installing Perplexity AI on Windows 11. While it may not be as well-known as some of its competitors, Perplexity AI can be just as powerful as other AI services.