In addition to managing Metered Connection in Windows 11, which restricts system bandwidth usage, users can also set data bandwidth limits. This feature has been available since Windows 10 and is particularly useful for those with limited data plans.
It’s worth noting that system data consumption can be substantial. Over a 24-hour period, the system may consume more than 400 MB for updates and applications, as shown in the example below.
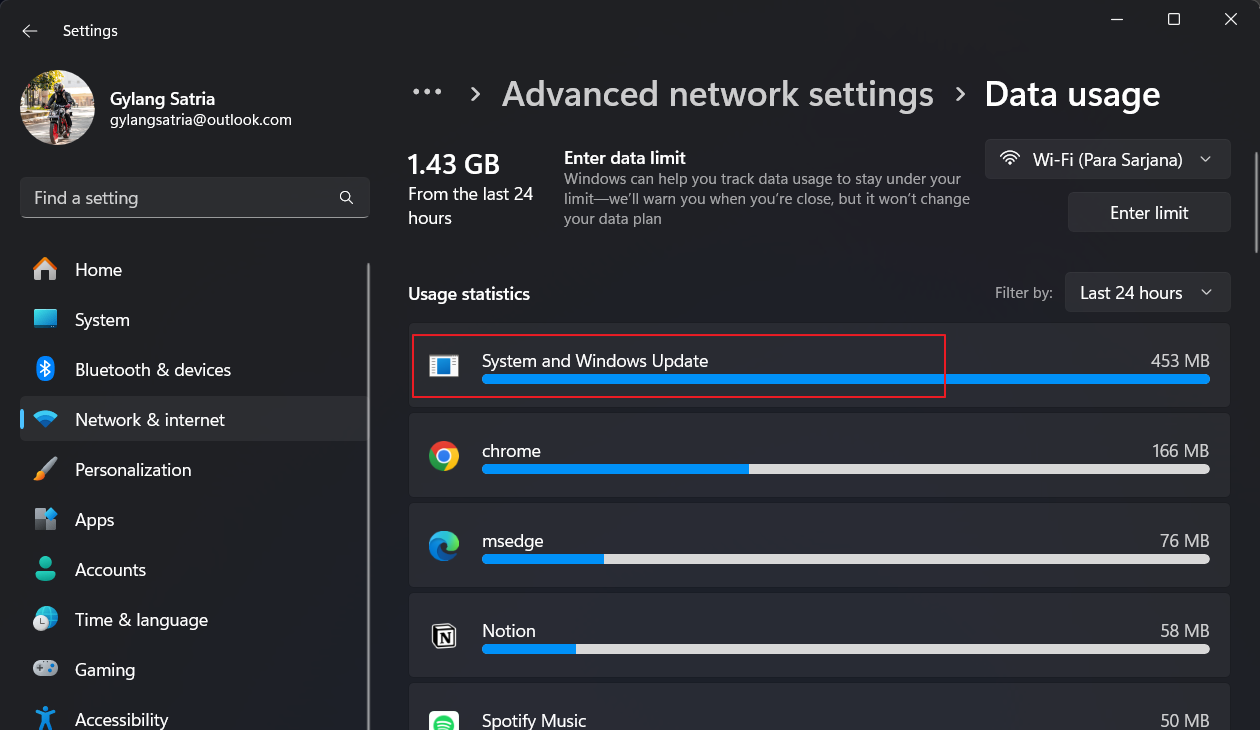
By configuring Metered Connections, users can significantly reduce the likelihood of excessive data usage by the system, minimizing it as much as possible.
Furthermore, users can set a specific data limit. When the limit is nearly reached, the system will issue a warning. Curious how to do this? Below are concise steps on how to set a data bandwidth limit in Windows 11.
Step 1. First, navigate to Settings > Network and Internet.
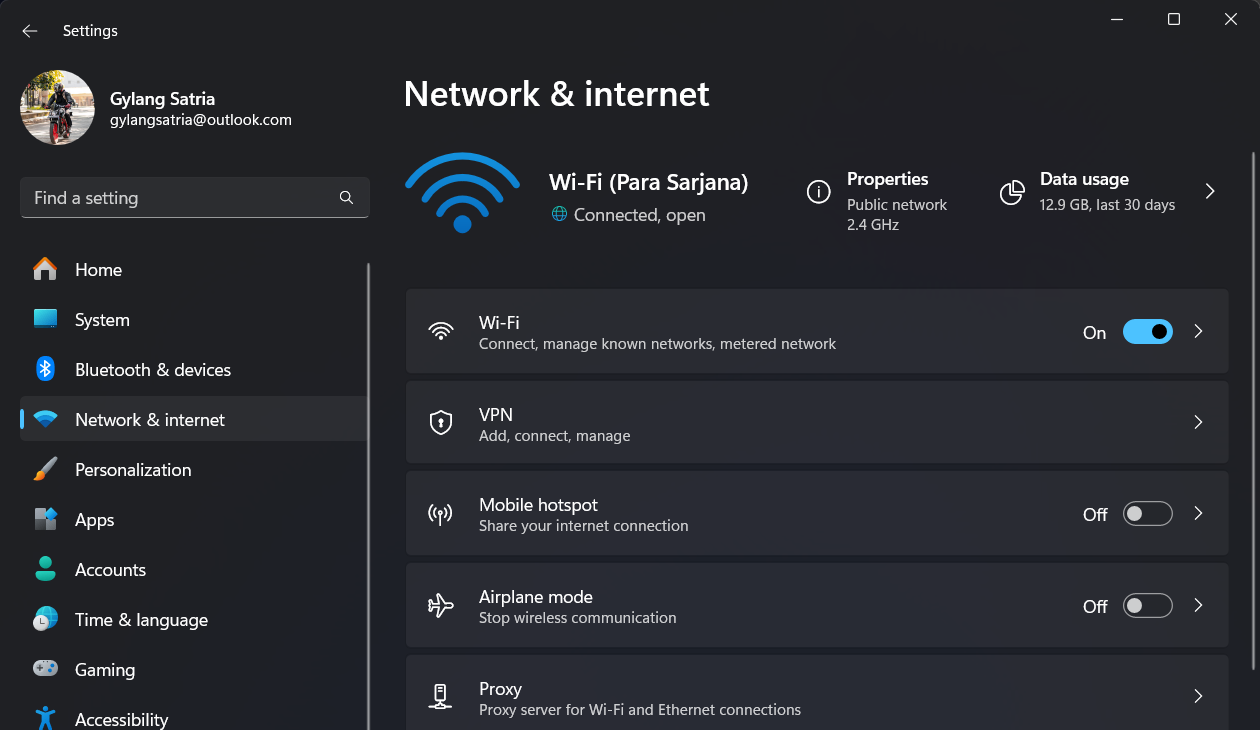
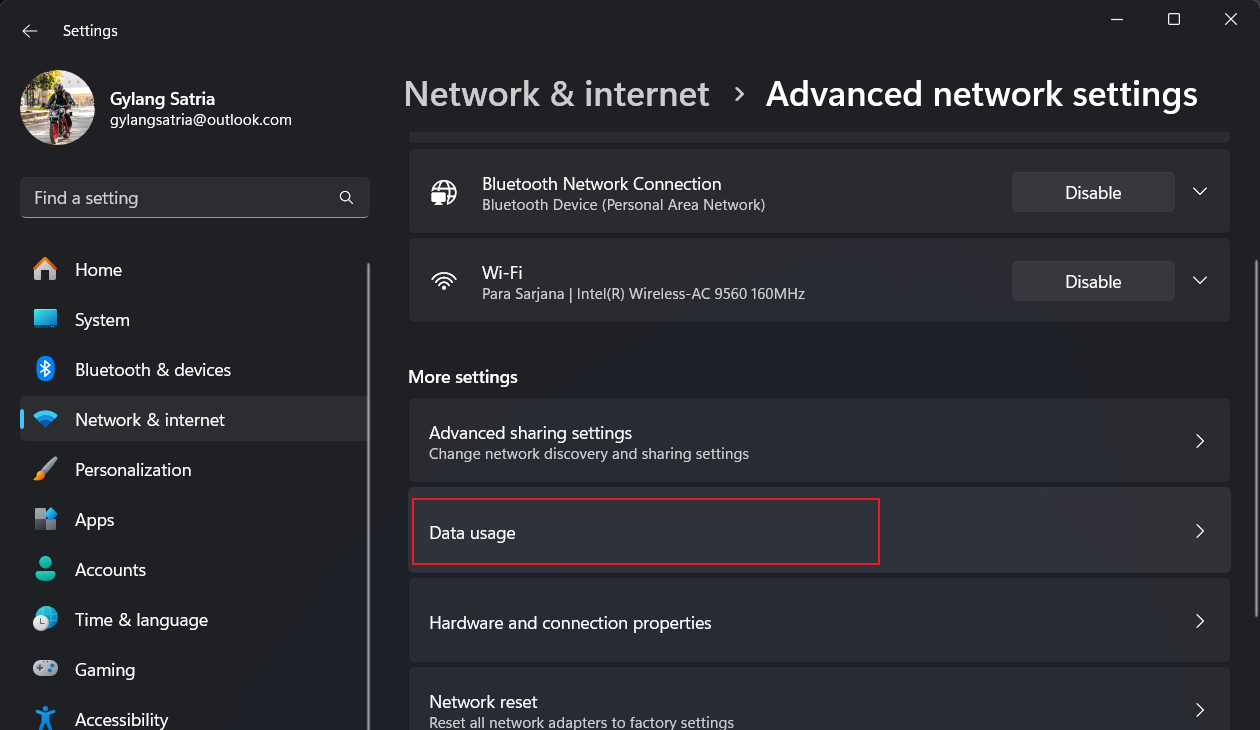
Step 2. Next, select Advanced network settings > Data usage.
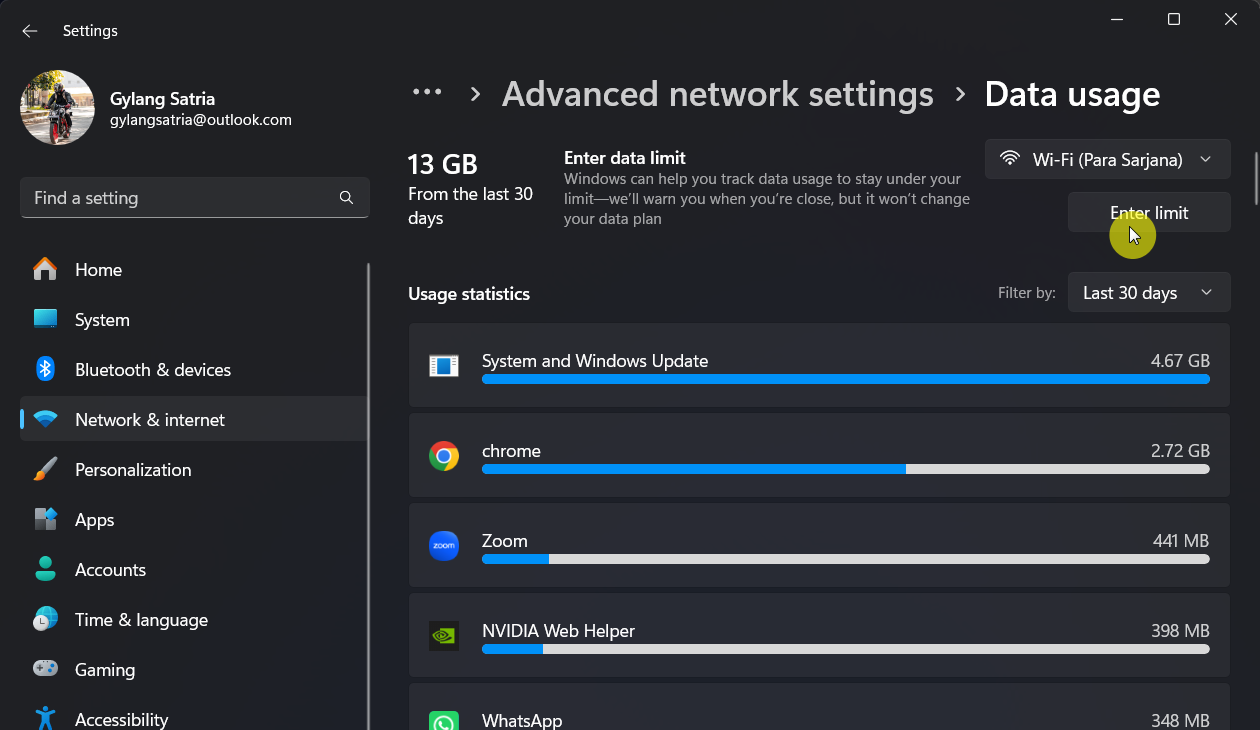
Step 3. Choose the interface you are using (e.g., WiFi) and then select Enter limit.
Step 4. Configure the Limit type, reset time, and the specific limit amount.
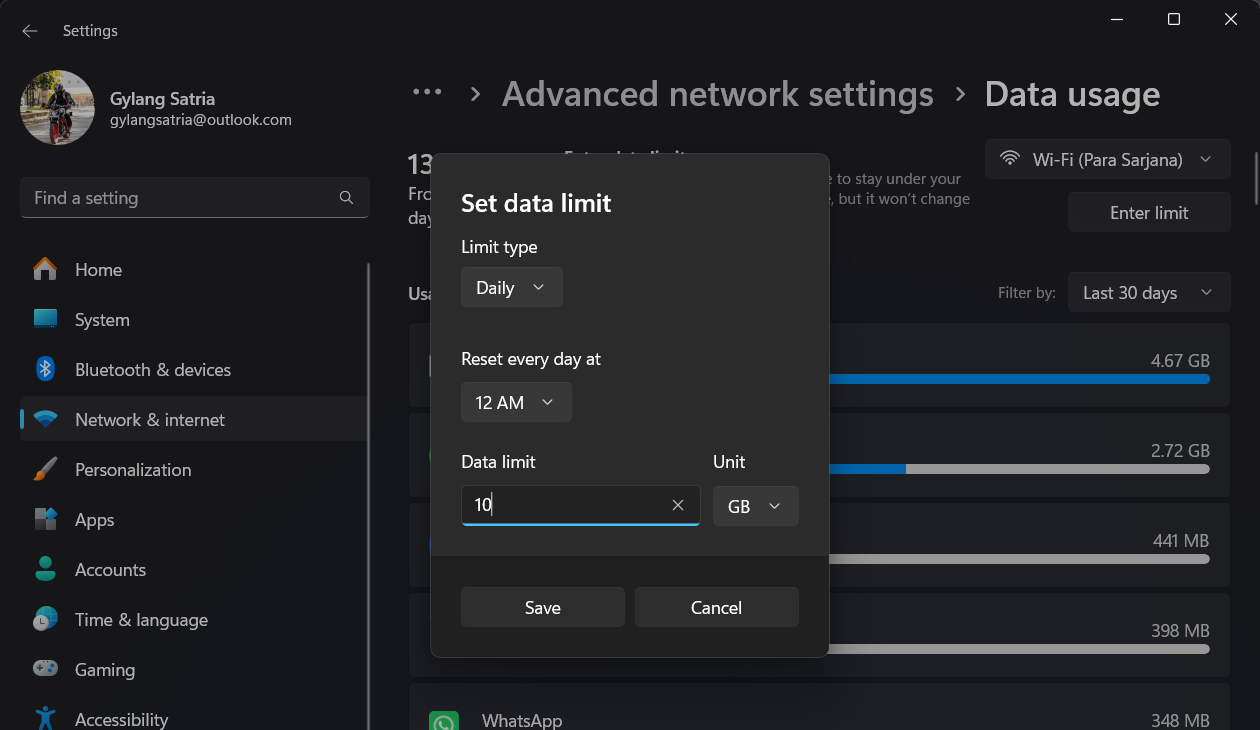
After completing these steps, click Save to apply the changes.
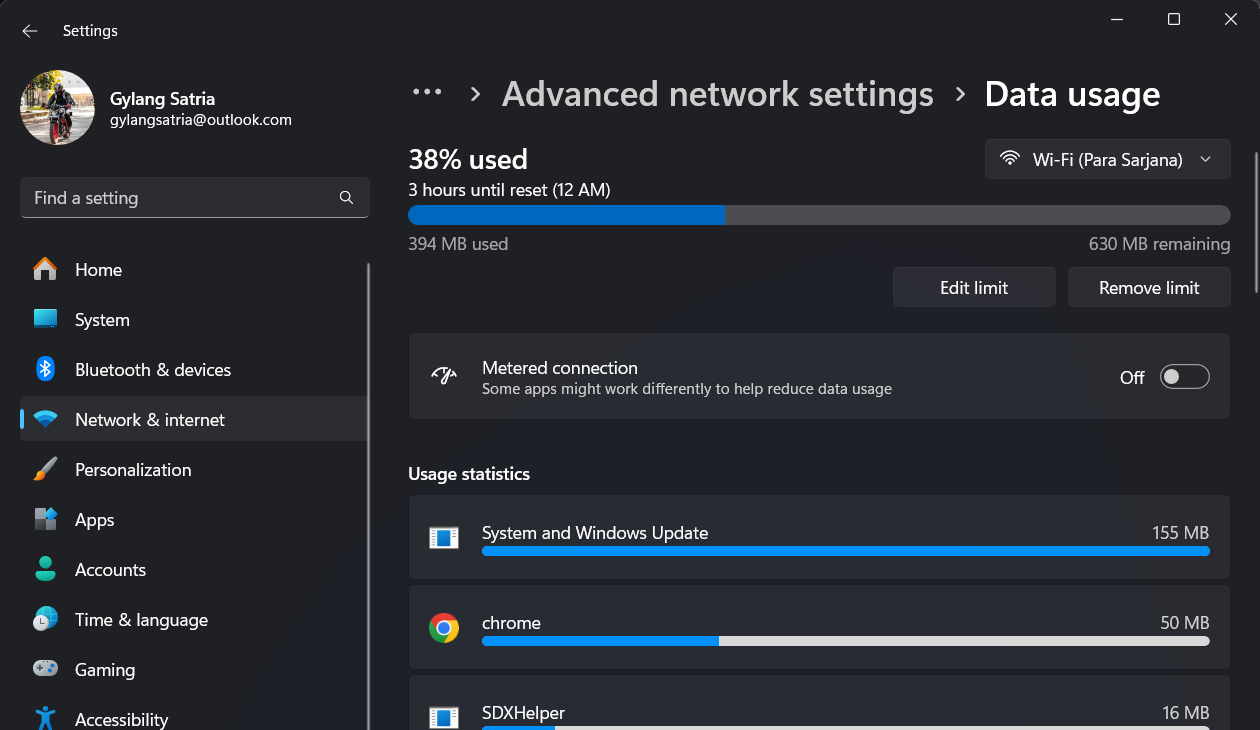
As shown in the image above, the page will display the remaining limit and the percentage of usage achieved.
This feature pairs exceptionally well with Metered Connections and is highly beneficial for users with restricted internet quotas.
Give it a try and see for yourself. We hope this guide has been helpful. Thank you.

