Most users typically operate their monitors in landscape mode as manufacturers set this as the default. However, some users require portrait mode for tasks like viewing lengthy text, coding, or other specific activities.
Users who utilize portrait mode often have a multi-monitor setup. In such cases, the primary monitor is usually in landscape mode, while the secondary monitor is configured to portrait mode.
Can you switch your monitor to portrait mode? Absolutely! Whether you’re using Windows 11, Windows 10, or earlier versions, the process is the same—adjust the screen orientation. If you’re ready to make this change, follow the steps below.
Also Read: How to Identify Which Process Is Accessing Files and Folders
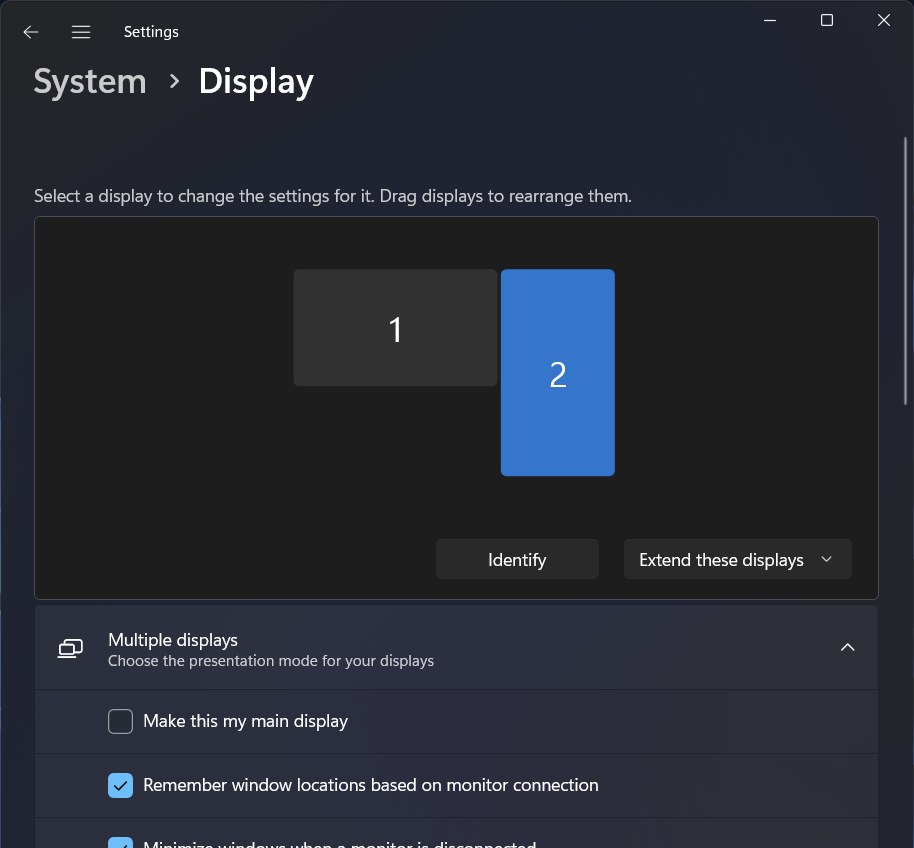
Step 1. First, navigate to Settings > System > Display.

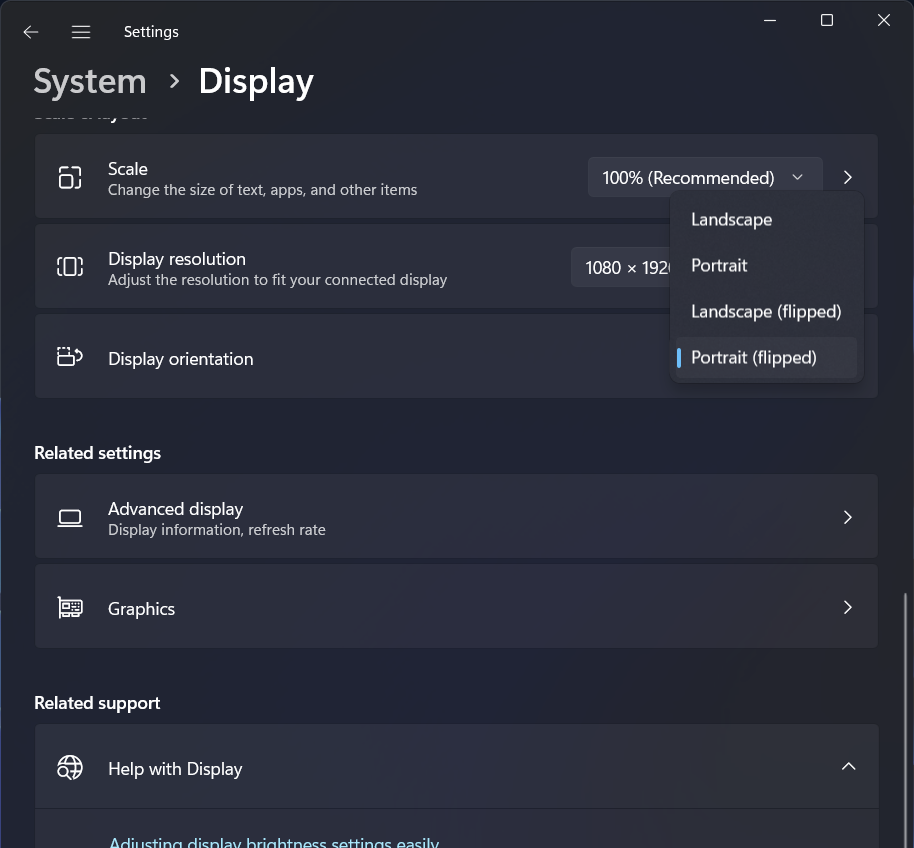
Step 2. Next, select the monitor you want to switch to portrait mode. Scroll down and choose Portrait or Portrait (Flipped) under Display Orientation.

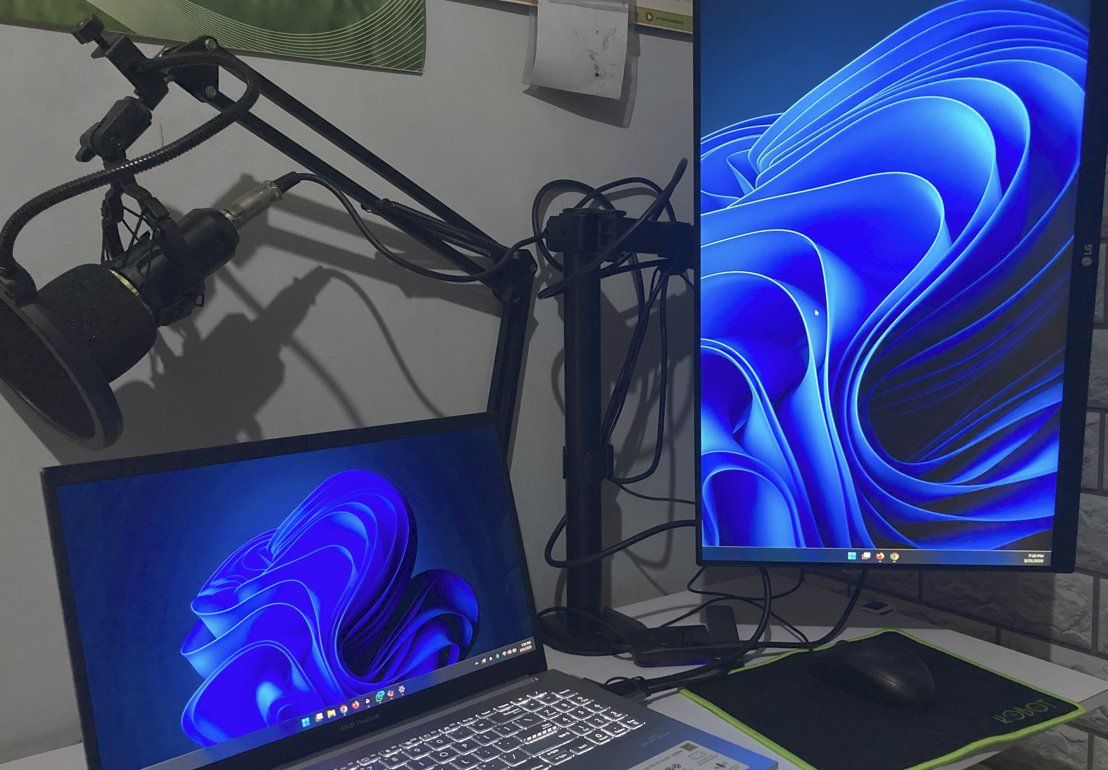
In my setup, I use Portrait (Flipped) mode, where the right side of the monitor becomes the bottom. If you prefer the left side as the bottom, simply select Portrait mode.
Here’s how it looks.

Switching to portrait mode might initially cause issues with Cleartype, making text and visuals appear odd. However, this becomes less noticeable over time.
Do you have tips to address Cleartype issues? Share your suggestions in the comments below. Interestingly, on Linux, the display appears more refined.


