During a clean install, it’s common to notice that the displayed time doesn’t match Indonesia’s regional time zones, whether it’s WIB, WITA, or WIT.
Similarly, if your laptop suddenly shuts down, the clock may malfunction, especially if the device’s CMOS battery is weak. Typically, the time settings will reset, and the clock configuration will disappear.
So, how can you fix this unsynchronized or incorrect clock issue? In Windows 11, it’s straightforward to resolve. Here’s a quick step-by-step guide.
Read Also:
Read Also:
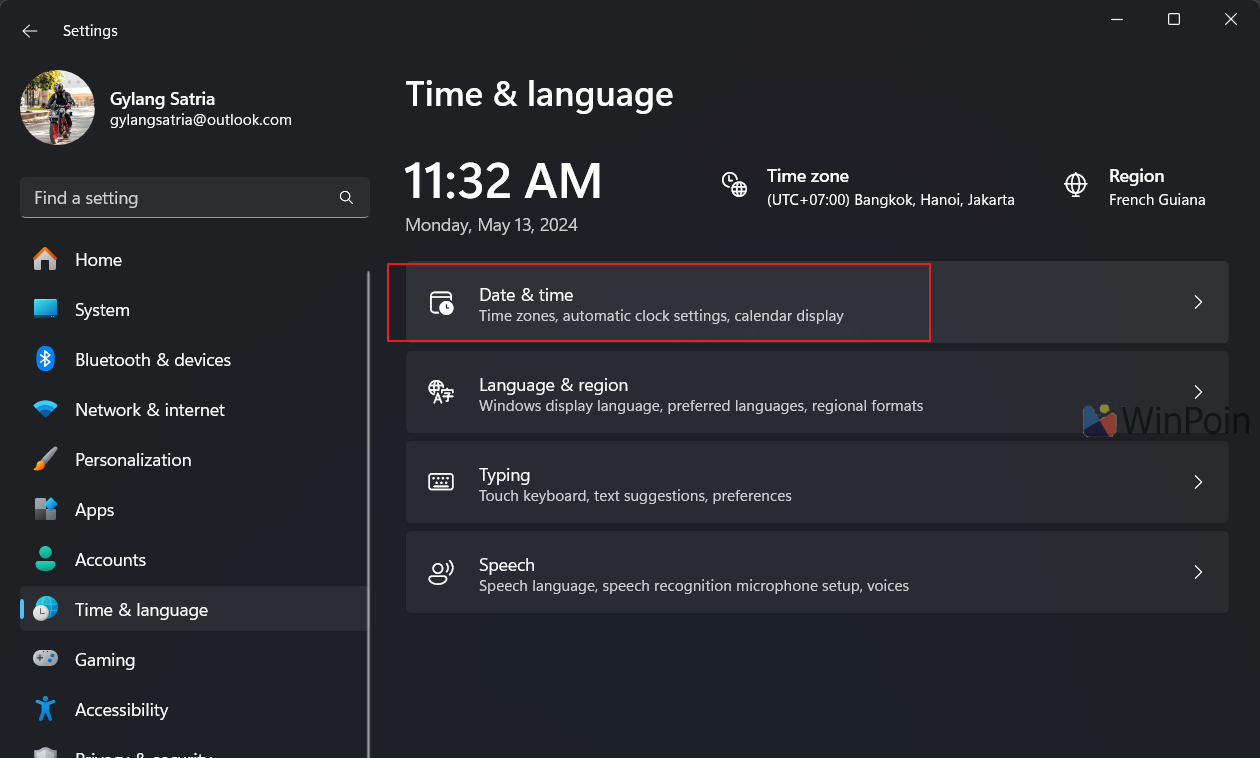
Step 1. First, navigate to Settings > Time & Language > Date & time.
Step 2. Next, set the Time zone and toggle on the automatic time setting.
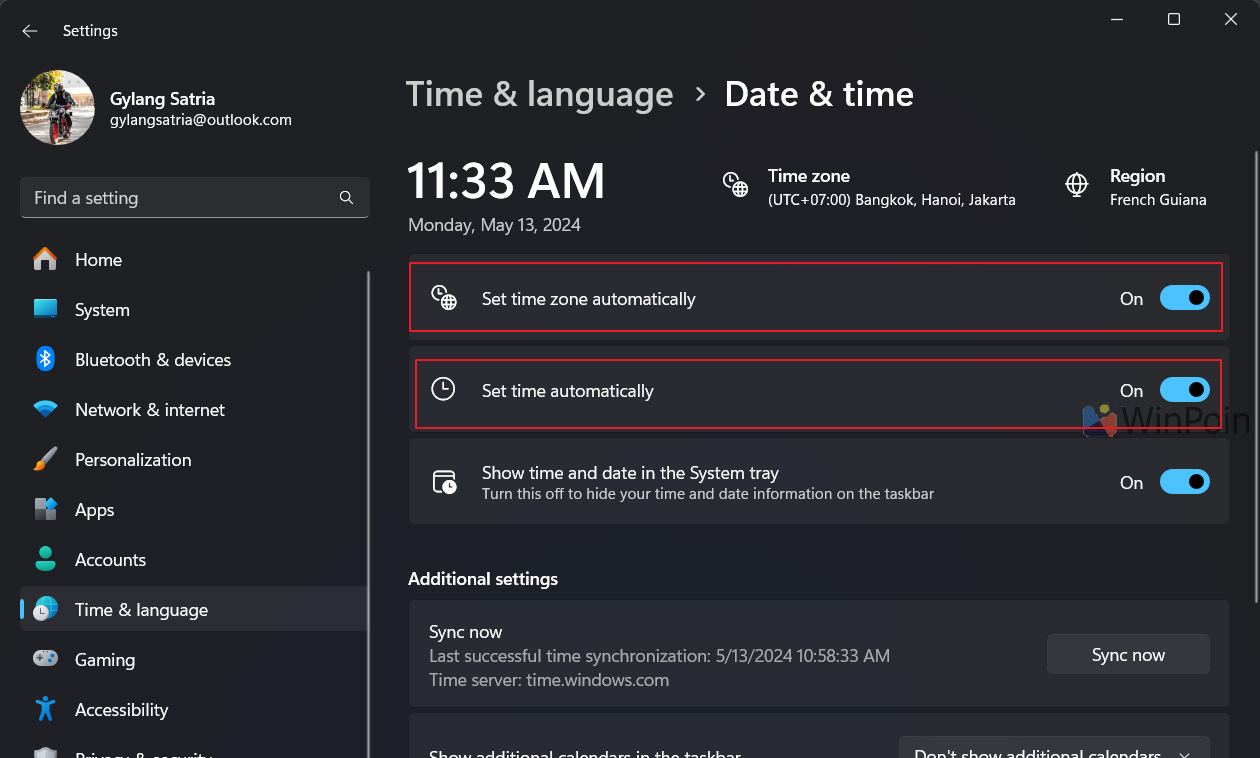
With automatic settings enabled, the system will immediately adjust the time zone, clock, and date when the device connects to the internet.
However, if the issue persists and the time remains incorrect, you can manually set the time zone to GMT +7. Then, toggle off and on the Set time automatically option.
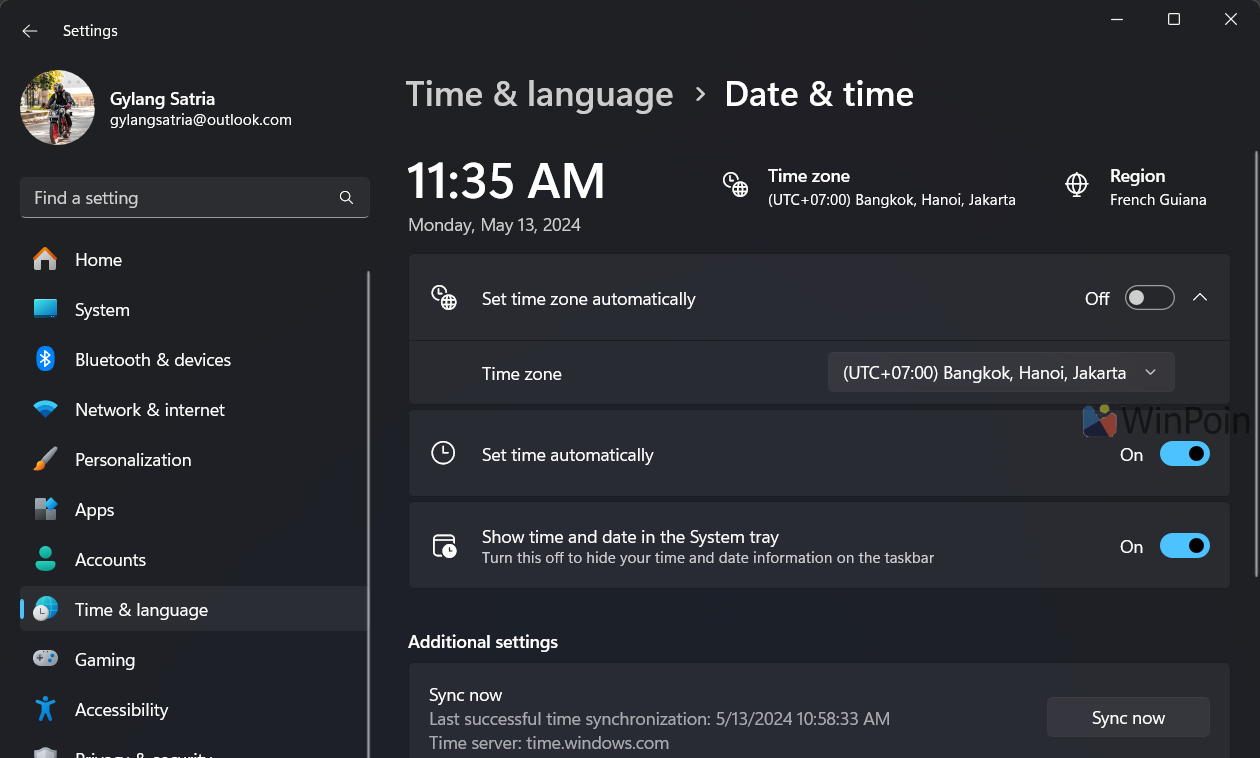
This trick usually resolves the problem. Just ensure your device’s hardware, including the CMOS battery, is in good condition, as it plays a crucial role in BIOS clock settings.
That’s a quick tip to fix an unsynchronized or incorrect clock in Windows 11. Give it a try, and I hope this article proves helpful. Thank you!

