As revealed in the New Features of Windows 11 24H2, this latest version introduces a feature called Windows Protected Print Mode, which is a universal modern print stack (driver) that allows users to connect printers without requiring third-party software.
According to Microsoft’s explanation, the core idea behind this feature is to enhance security and enable printers to function in a plug and play or PNP manner without additional software. It’s important to note that enabling this feature will automatically remove printers that are incompatible with it.
Also Read: How to Get Windows 11 24H2 Right Now!
In other words, only compatible printers will support this feature, specifically those certified with mopria. To check if your printer is supported, you can visit the following page.
So, how do you activate Windows Protected Print Mode? Here’s a quick summary of the steps.
Read Also:
Step 1. First, ensure you’re using Windows 11 24H2 or a newer version.
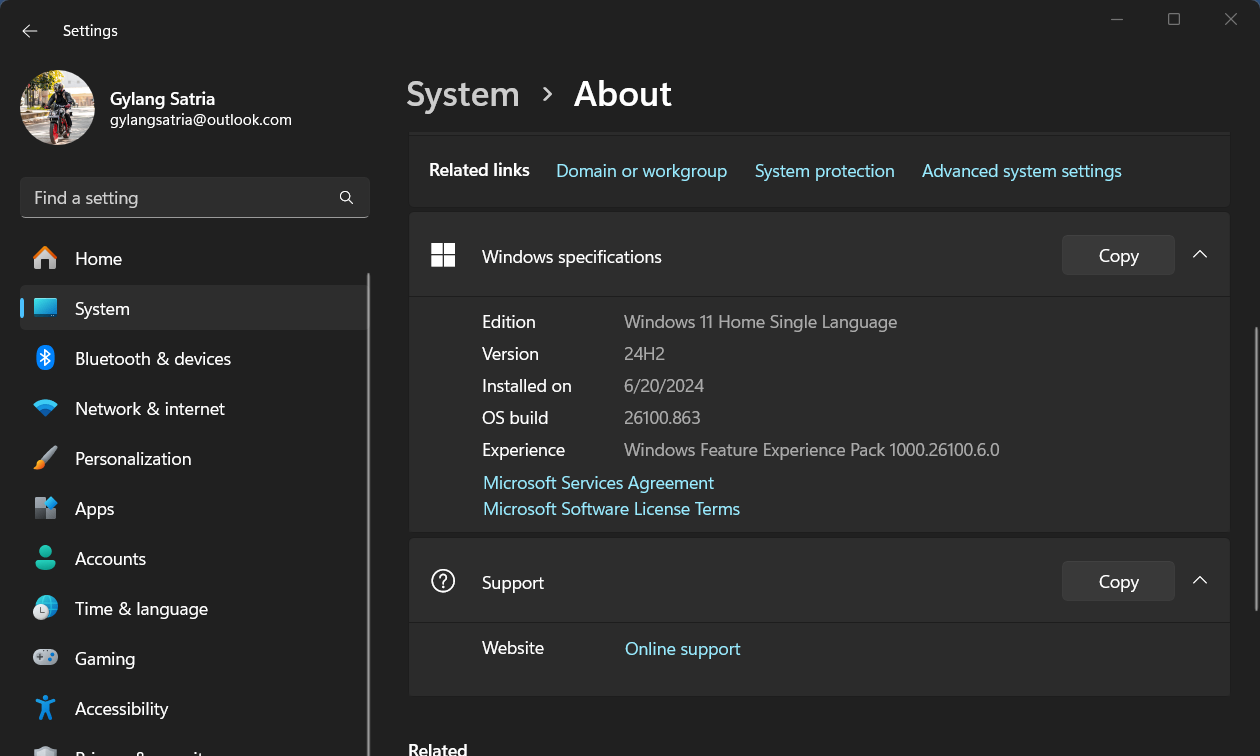
Step 2. Next, navigate to Settings ? Bluetooth & devices > Printers & scanners.
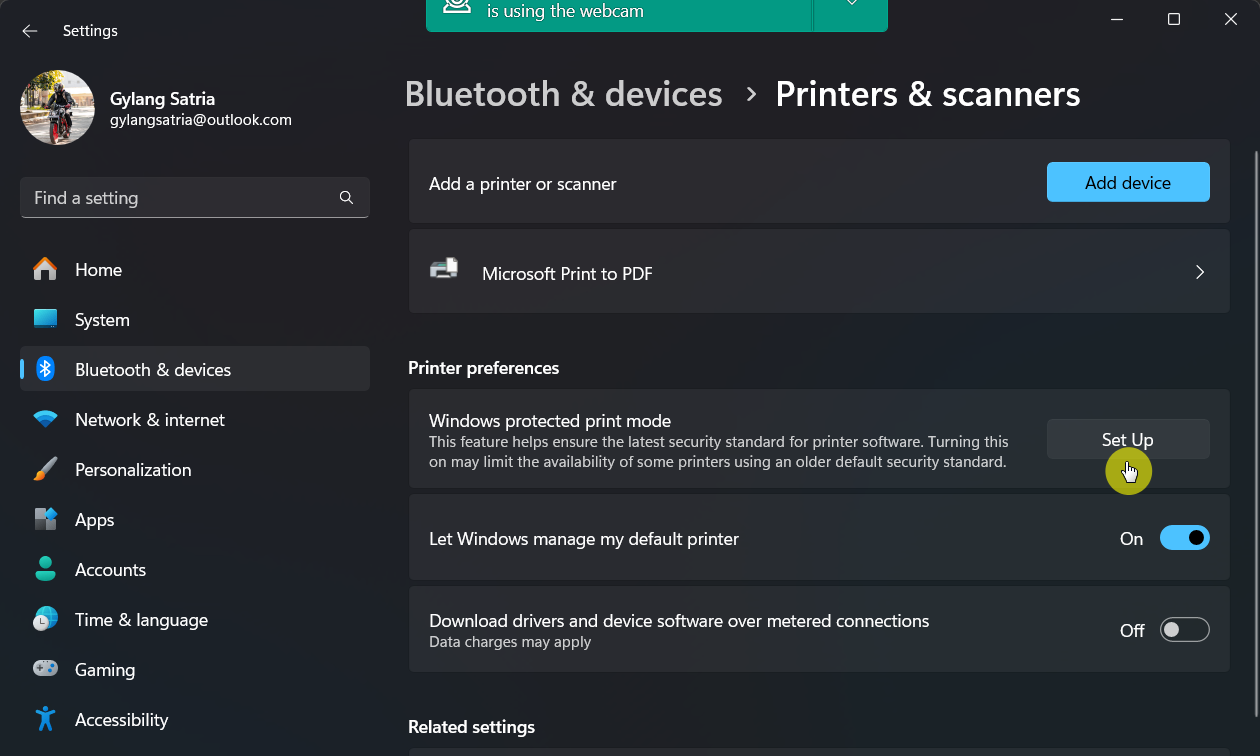
Step 3. Click the Set Up button to configure “Windows Protected Print Mode”.
Step 4. Then, click the Yes, continue button. Remember, all incompatible printers will be removed from the device.
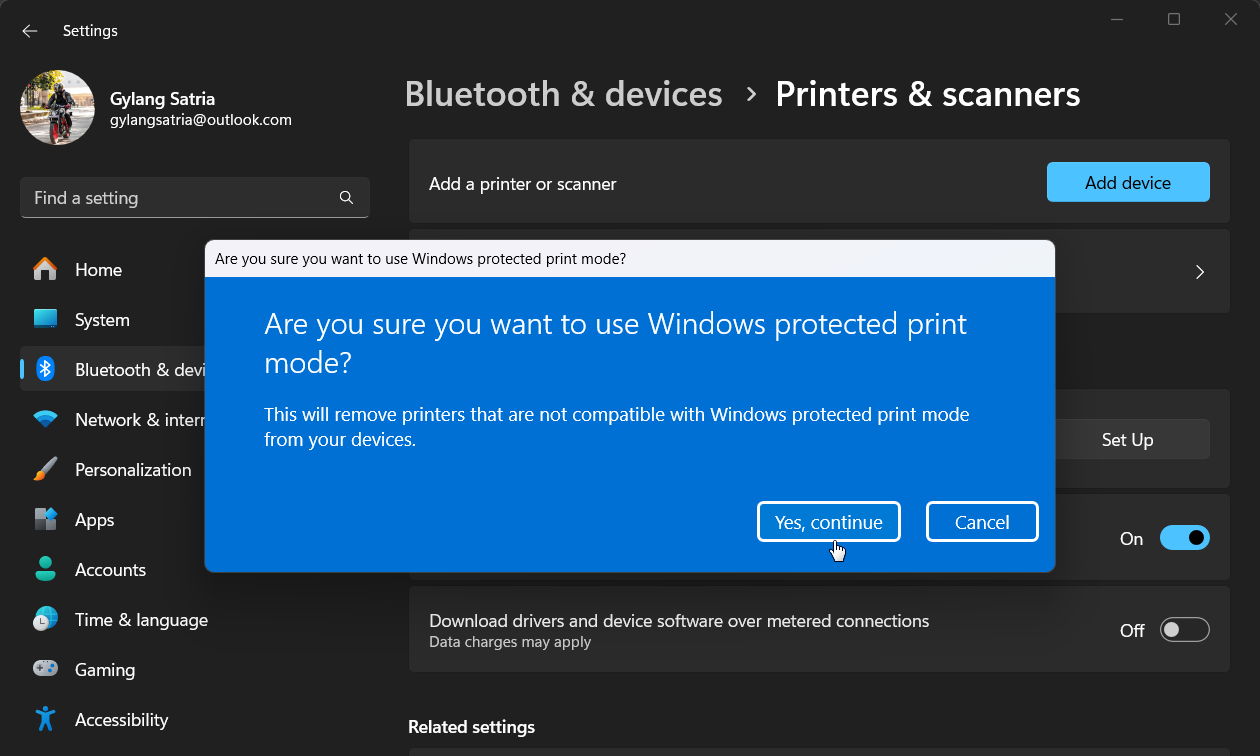
Once you press the Yes, continue button, you can now use your printer with Windows Protected Print Mode.
Does your printer support this feature? Let us know in the comments. Just a heads up, the Epson L210 I’m using unfortunately does not support this feature.

