File sharing offers a cost-effective and simple solution for distributing files within a network. However, transfer speeds can become a significant issue, especially when devices rely on non-Gigabit Ethernet connections, which are notably slower.
For instance, I utilize a home server running Linux Ubuntu configured as a Network Attached Storage (NAS) with a total capacity of 6 TB. This setup is accessible exclusively to the residents of my current boarding house, whether for data backups, file sharing, or other purposes. Despite its utility, the network connection is limited to 100 Mbps using an affordable Mikrotik router priced around Rp300,000.
A common question arises: can we measure the transfer speed of this NAS or file-sharing system? The answer is yes, and it doesn’t require manually transferring large files. A handy tool named iperf3 can be employed for this purpose.
If you’re curious, here’s a concise guide on how to easily check the transfer speed of your NAS or file-sharing setup.
Step 1. To begin testing transfer speeds, ensure that iperf3 is installed on your server.
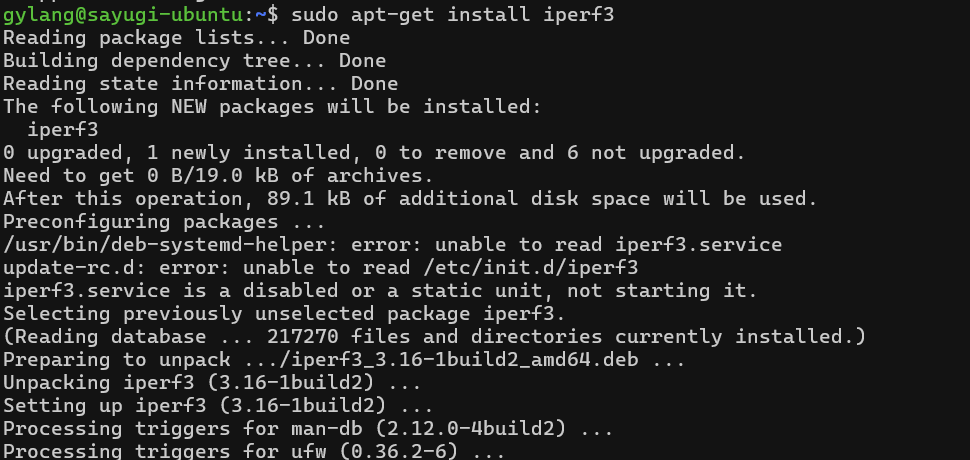
Step 2. Once installed, make sure the port used by iperf3 is allowed through your firewall. Typically, iperf3 uses port 5001 or, alternatively, port 5201.

Step 3. After installing iperf3 on your server and configuring the firewall rules, download the iperf3 application for Windows from the GitHub page here, and don’t forget to extract the files.
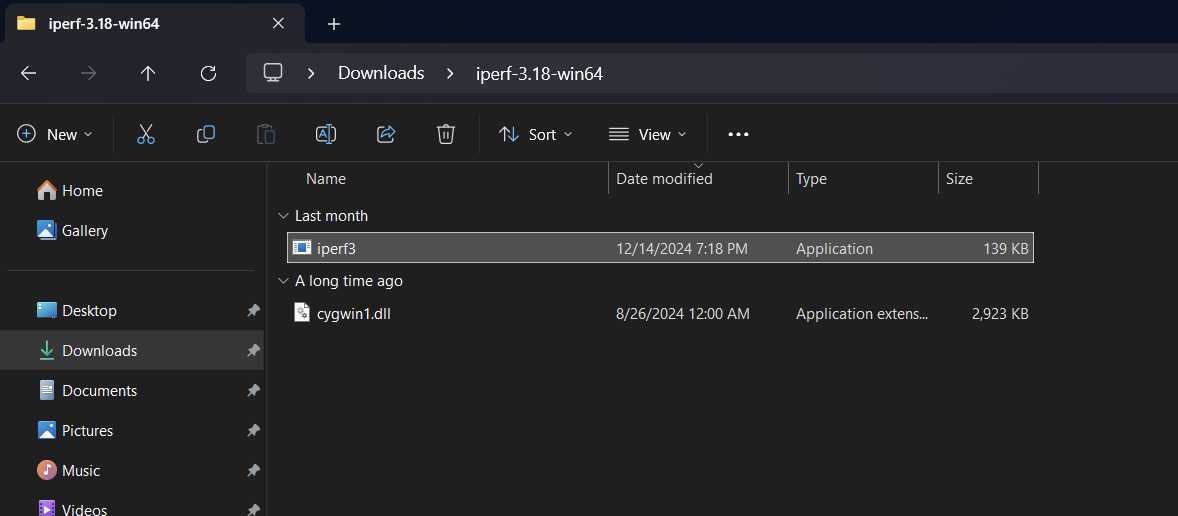
Step 4. Next, open the terminal or command prompt and navigate to the location where you saved the iperf3 files.
Then, enter the following command to initiate the network transfer speed test.
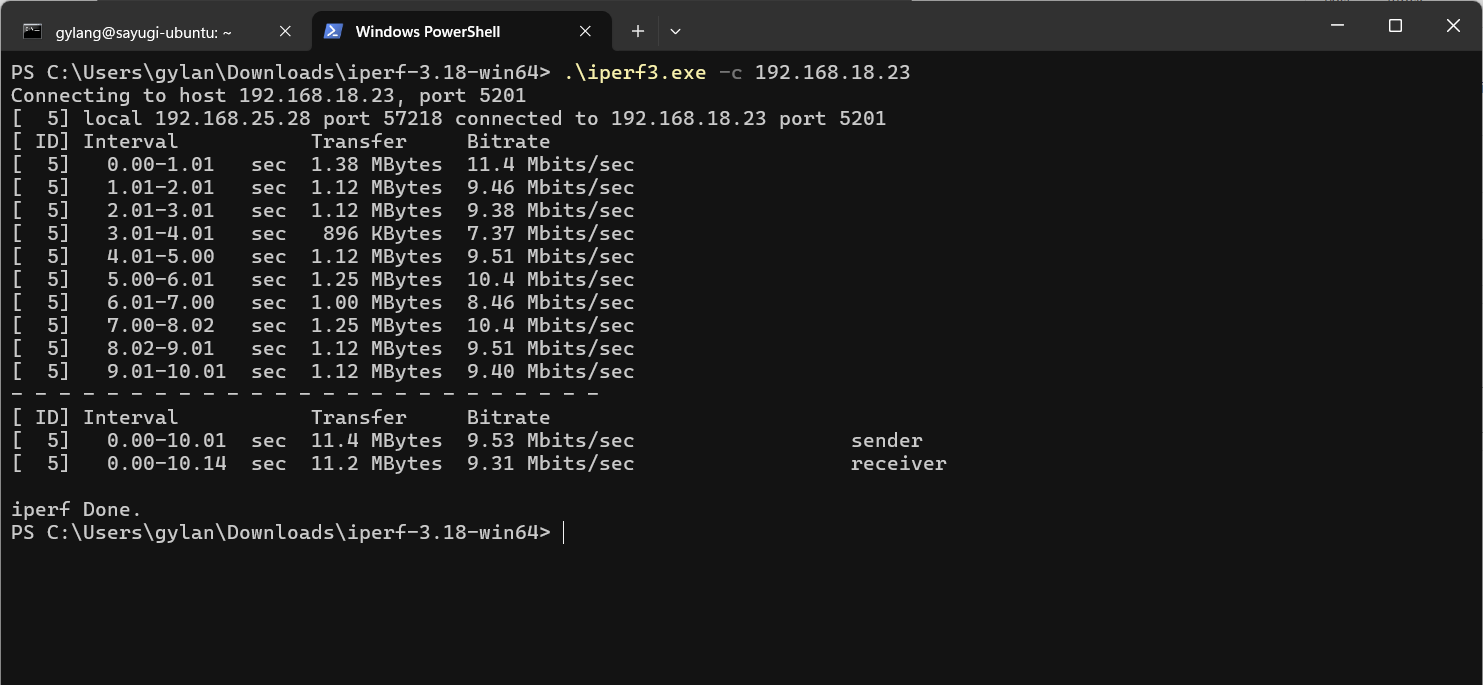
As shown in the image above, iperf3 will start testing the data transfer speed with multiple trials. In my case, the server’s data transfer rate was approximately 9.53 Mbits, primarily limited by the Mikrotik router’s maximum speed of 100 Mbps.
If you’re using a dedicated NAS or a device that supports Gigabit or even 10 Gigabit connections, the speed will undoubtedly be much faster. However, for my needs, the current setup suffices.
These are the essential steps and tips for checking the transfer speed of your NAS or Network Attached Storage. The key takeaway is to ensure that iperf3 is installed on both the server and client. If you’re using a Linux Debian-based server, this method is applicable. Otherwise, you can download iperf3 from the following page, tailored to your server type.
I hope this article proves useful. Thank you.

